Your Guide to the Testing Tool Playwright | Boost Your Testing

If you've been in the web development world for a while, you know the pain of flaky end-to-end tests. Older frameworks often meant battling timing issues, writing complex selectors, and dealing with tests that would pass one minute and fail the next. It was a constant source of frustration for dev and QA teams alike.
Enter Playwright, a modern, open-source testing tool from Microsoft built to solve these exact problems. It’s designed from the ground up to automate browser actions with the speed and stability today's complex web applications demand. What really sets it apart is its ability to drive Chromium, Firefox, and WebKit with a single, elegant API.
Why Playwright Is a Go-To Modern Web Testing Tool
Playwright wasn't just another testing tool; it was an answer to a problem. Released in 2020, its architecture was specifically designed for the modern web. Instead of relying on the slower HTTP-based protocols of its predecessors, Playwright communicates with browsers over a persistent WebSocket connection. This is a game-changer for speed and reliability.
The old way of doing things often meant littering your test code with custom wait conditions just to keep things from breaking. It was a brittle and inefficient process. Playwright flips that script entirely.
Reliability Through Smart Features
One of its most celebrated features is auto-waiting. Before Playwright performs an action, like a click or typing into a field, it automatically waits for the element to be ready. This simple yet profound feature eliminates an entire class of common test failures caused by timing issues.
Instead of peppering your code withsleep()orwaitForElement()calls, Playwright intelligently handles the asynchronous nature of web apps. This means your tests aren't just faster—they're far more reliable and a whole lot easier to write.
The developer community has certainly taken notice. Playwright's growth has been nothing short of explosive, quickly becoming a favorite in the test automation space. By 2025, it had already amassed over 74,000 stars on GitHub and was a key dependency in roughly 412,000 repositories, leaving many older tools in the dust. You can find more data on this industry shift in this Playwright vs. Selenium comparison.
To help you see why so many developers are making the switch, here’s a quick rundown of Playwright's core strengths.
Playwright Core Features at a Glance
This table summarizes the standout features that make Playwright a top-tier testing tool for modern web development.
| Feature | Benefit |
|---|---|
| Cross-Browser | Write one test and run it on Chromium, Firefox, and WebKit for broad coverage. |
| Auto-Waiting | Eliminates flaky tests by automatically waiting for elements to be actionable. |
| Rich Tooling | Includes Codegen for recording tests and Trace Viewer for easy debugging. |
| Speed & Stability | Uses a modern architecture for faster, more reliable test execution. |
| Network Control | Mock and stub network requests to test edge cases without a live backend. |
These features work together to create a testing experience that feels productive and empowering, not like a chore.
Developer-Focused Tooling
Beyond its powerful engine, Playwright comes with a suite of tools that are baked right into the developer workflow. These aren't just afterthoughts; they’re designed to make writing and debugging tests a breeze.
- Codegen: This is a lifesaver. You can simply perform actions in a browser, and Codegen will automatically generate the corresponding test script for you. It's an incredible way to get new tests up and running quickly.
- Trace Viewer: When a test fails, this tool is your best friend. It gives you a detailed, step-by-step trace of the entire execution, complete with DOM snapshots, network logs, and console output. Debugging becomes a much faster, more intuitive process.
These tools transform test development from a frustrating task into an interactive and genuinely productive experience. If you're ready to see what it can do for your projects, our complete guide explores how to get started with the Playwright automation testing tool.
Getting Your First Playwright Project Off the Ground
Jumping into a new testing tool can feel like a big commitment, but I've found that getting a Playwright project running is surprisingly quick. Honestly, the only real prerequisite is having a recent version of Node.js on your machine. Once that's handled, a single, interactive command does all the heavy lifting.
Just open your terminal in an empty project folder and fire away:
npm init playwright@latest
This command kicks off the official Playwright initializer. Instead of forcing you to hunt down config files and piece things together, it walks you through a few simple questions to scaffold your project just right.
Navigating the Interactive Setup
The initializer will ask you a few key things. Getting these right from the start can save you a lot of time down the road.
- TypeScript or JavaScript? You can absolutely use plain JavaScript, but I strongly recommend TypeScript for the testing tool Playwright. The type-safety and autocompletion you get in your editor are lifesavers for preventing bugs and just writing tests faster.
- Name of your tests folder: The default is
tests, which is a perfectly sensible convention. You can change this if your project has a different structure, but sticking with the default is usually the path of least resistance. - Add a GitHub Actions workflow? This is a fantastic option to say "yes" to. It automatically creates a
.github/workflows/playwright.ymlfile, giving you a CI/CD pipeline right out of the box to run your tests on every push. It's a small choice that sets you up for automated testing from day one.
Once you’ve made your choices, the installer takes over. It pulls down the necessary Playwright packages and, critically, the browser binaries for Chromium, Firefox, and WebKit.
My two cents: Don't stress about getting these choices perfect on the first try. The playwright.config.ts file is incredibly flexible, and you can always add a GitHub Actions workflow later. The main goal here is to get from zero to a running test as fast as possible.Here's the framework's official logo—it's become a familiar sight in the world of web automation.

The clean, modern design really fits. It reflects the framework's focus on providing a sleek, reliable, and genuinely up-to-date solution for testing modern web apps.
Understanding the Project Structure
After the installation wraps up, you'll see a few new files and folders. The most important one to look at first is tests/example.spec.ts. This is a sample test, automatically generated to give you a working example you can learn from and build on.
Let's break down what you're seeing in that file:
testandexpect: These are the bread and butter of your tests, imported from@playwright/test. Thetestfunction is where you define a test case, andexpectis how you make assertions to check if your application is behaving correctly.- The
pagefixture: Theasync ({ page })argument is, in my opinion, one of Playwright's most powerful features. Thepageobject is your main entry point for interacting with a web page—it’s how you'll navigate to URLs, click buttons, and pull information.
By giving you a clean, interactive setup and a ready-made example, Playwright dramatically lowers the barrier to entry. You can go from an empty folder to a fully configured project with a runnable test in just a couple of minutes. This thoughtful onboarding is a huge reason why so many developers find the testing tool Playwright so approachable.
Alright, let's dive into the fun part—putting Playwright to work. We're going to move past the default sample test that gets generated and write a practical end-to-end (E2E) scenario from the ground up.
Let's imagine we're testing a classic login form on a demo application. This is a perfect example of an E2E test because it validates a critical user journey from start to finish.
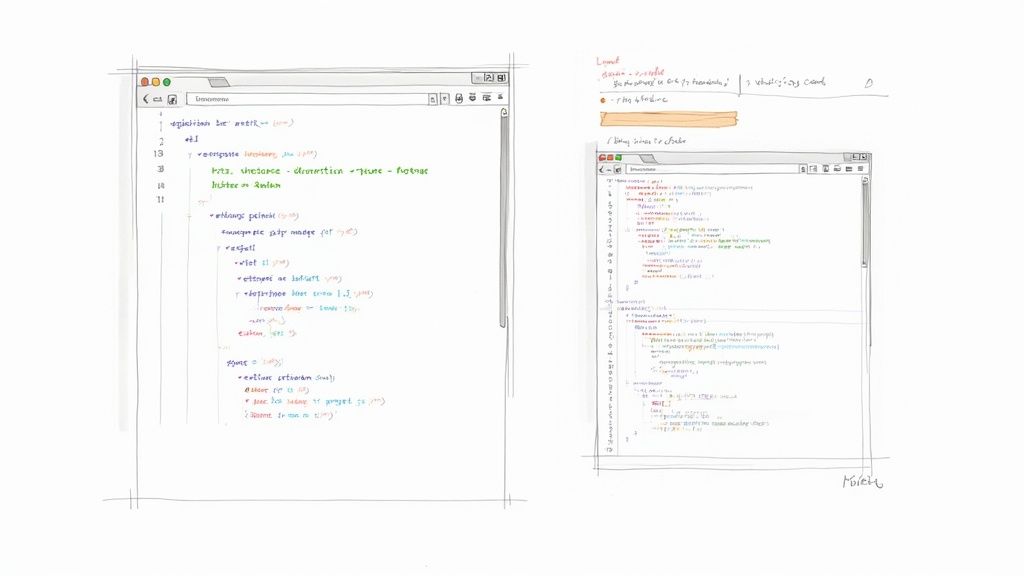
First things first, we'll create a new test file. I'll call it login.spec.ts and place it inside the tests directory. The basic structure will look pretty familiar if you've seen Playwright before; we just need to import test and expect from @playwright/test.
import { test, expect } from '@playwright/test';
test('should allow a user to log in successfully', async ({ page }) => {
// Our test steps will go here
});
With our test file ready, the first real step inside our test block is to tell the browser where to go. The page.goto() method is what we use for this, and it simply loads the URL of our login page.
Simulating User Interactions
Once the page is loaded, we need to interact with it just like a real user would. This means finding the username and password fields and typing into them. A common mistake I see a lot is relying on fragile selectors like specific CSS classes or IDs. These can break with even minor frontend code changes, making your tests a maintenance nightmare.
Playwright has a much better way. It strongly encourages using locators that are resilient and user-facing. The getByLabel() locator is my go-to for this. It finds an input field tied to a specific text label, which is exactly how a human would identify it on the screen.
Here’s how we can fill out the form using this method:
await page.getByLabel('Username').fill('testuser');await page.getByLabel('Password').fill('securePassword123');
This code isn't just robust; it's incredibly readable. Anyone on your team can glance at it and know exactly what's happening.
After filling in the credentials, the next logical action is clicking the login button. For this, getByRole('button', { name: 'Log In' }) is the perfect choice.
// Click the login button
await page.getByRole('button', { name: 'Log In' }).click();
This locator finds a button element with the accessible name "Log In," again mimicking how a user finds and interacts with elements on the page. It's so much more stable than hunting for a btn-primary class.
Asserting the Outcome
Just performing actions isn't enough; a test isn't a test without verification. We need to check the result. A successful login should redirect the user to a dashboard or a welcome page, and we can confirm this with a simple yet powerful assertion.
The expect(page).toHaveURL() assertion checks if the browser's current URL matches an expected pattern. This single line confirms the redirect happened as planned, validating our entire login flow from start to finish.
Key Takeaway: A great test isn't just about what it does, but what it proves. Combining user-facing actions (getByLabel,getByRole) with clear assertions (toHaveURL) creates tests that are both stable and easy for anyone to understand.
Running Your Test and Viewing the Report
With our test written, running it is a breeze. Pop open your terminal and execute the command npx playwright test. Playwright will fire up and run your tests, by default in headless mode across all the browsers you configured during setup.
If you want to see the magic happen in real time, just add the --headed flag:
npx playwright test --headed
This will open actual browser windows and let you watch the automation unfold live. It’s incredibly useful for debugging.
Once the tests are complete, Playwright generates a beautiful HTML report. You can open it right away with this command:
npx playwright show-report
This report gives you a detailed breakdown of every test run, including each step, how long it took, and any errors that popped up. It's an indispensable tool for debugging and sharing results with your team.
This intense focus on developer experience and powerful tooling is a big reason for Playwright's incredible growth. By mid-2024, it had already surpassed Cypress in weekly downloads, hitting over 6 million. The recent rise of AI-assisted tools built on top of Playwright has only accelerated this trend, with some companies reporting a 50% reduction in test creation time. You can explore more about these trends in Playwright adoption to see just how quickly the landscape is shifting.
Using Advanced Playwright Features and Tools
Once you've got the hang of writing basic tests, it's time to unlock what makes Playwright a real powerhouse. The advanced features are what separate a beginner from a pro, turning tedious, manual tasks into smooth, automated workflows. These tools are specifically designed to speed up test creation and simplify debugging, which, let's be honest, are often the most time-consuming parts of the QA process.
Let Playwright Write the Code for You with Codegen
One of the most impactful features right out of the box is Playwright Codegen. It's a fantastic tool that watches you interact with your website and automatically generates clean, readable test code based on your actions. It's a game-changer.
To get it running, just pop this command into your terminal:npx playwright codegen your-website-url.com
This command fires up a new browser window right next to the Playwright Inspector. As you click on elements, fill out forms, and navigate through your application, Codegen records every single action and translates it into a ready-to-use test script. It’s an incredible time-saver for scaffolding out the initial structure of a test.

Debugging with the Trace Viewer
Look, even the best-written tests will fail sometimes. It happens. When they do, Playwright's Trace Viewer is a debugging beast designed to make finding and fixing issues incredibly straightforward. When a test fails, Playwright can generate a trace.zip file that contains a complete, time-traveling recording of the entire test run.
You can view the trace by running npx playwright show-trace trace.zip. This opens up a detailed dashboard where you can see:
- Action Timeline: A step-by-step list of every action Playwright performed.
- DOM Snapshots: A look at the DOM before and after each action.
- Network Logs: A full record of all network requests and responses.
- Console Output: Any messages logged to the browser console during the test.
Instead of guessing what went wrong, the Trace Viewer lets you scrub through the test's timeline, visually inspect the state of the application at any moment, and analyze all related data in one place. It transforms debugging from a frustrating chore into a quick, analytical process.
Going Beyond Simple Browser Interactions
A truly robust testing strategy often needs to go beyond just clicking around a UI. Playwright gets this and comes equipped with several advanced capabilities to handle more complex scenarios.
Handling Authentication
Logging in through the UI for every single test is slow and brittle. A much better strategy is to handle it programmatically. You can use the request context to make a direct API call to your login endpoint, grab the authentication token, and then load it into the browser's state for all subsequent tests to use.
Visual Regression Testing
Playwright has built-in screenshot testing. You can take a snapshot of a component or an entire page and have Playwright compare it against a baseline image on future test runs. This is perfect for catching those sneaky, unintended visual bugs, like a CSS change that accidentally breaks your layout.
API Request Management
You can also use the page.route() method to intercept and even modify network requests on the fly. This is incredibly useful for testing edge cases—like simulating a slow network response or a 500 server error—without ever having to touch the backend.
The framework's rapid evolution and powerful features have fueled its fast adoption. As of late 2024, the testing tool Playwright is used by over 3,000 companies and its market share is growing quickly, a significant jump from its launch in 2020. This growth highlights a broader trend where development teams are moving towards modern tools that offer speed and reliability. You can find out more about the current market dynamics in testing tools and see how it stacks up.
Integrating Playwright into Your CI/CD Pipeline
Automated tests really shine when they're a core part of your development lifecycle, not just an afterthought. By integrating a testing tool like Playwright into your Continuous Integration/Continuous Deployment (CI/CD) pipeline, you ensure every single code change gets validated automatically. This is how you catch bugs before they ever make it to production. It transforms testing from a periodic, manual chore into a constant, automated quality gate.
For most teams, the easiest entry point for this is GitHub Actions. The best part? Playwright can generate a ready-to-use workflow file for you right out of the box during setup. This isn't just some generic template; it’s a fully functional pipeline built with best practices in mind.
Dissecting the GitHub Actions Workflow
When you agree to the GitHub Actions setup during initialization, Playwright drops a playwright.yml file into your .github/workflows directory. This YAML file is the blueprint for the automated process that will run your entire test suite.
Let's break down the essential jobs it sets up for you.
- Installing Dependencies: The first thing the workflow does is check out your repository's code and then run
npm ci. This command installs all your project's dependencies exactly as they're listed in yourpackage-lock.jsonfile. This guarantees a consistent, reliable environment every single time the workflow runs. - Downloading Browsers: Next up is a critical step:
npx playwright install --with-deps. This command downloads the specific browser binaries—Chromium, Firefox, and WebKit—that your tests will run against. It's how you ensure the CI environment perfectly mirrors your local setup. - Running the Tests: Finally, the workflow executes
npx playwright test, which kicks off your entire test suite. These tests run headlessly, which is perfect for a server environment, giving you fast and efficient feedback on your latest code changes.
This simple, three-step CI process shows just how smoothly code can flow from a commit to a final report.
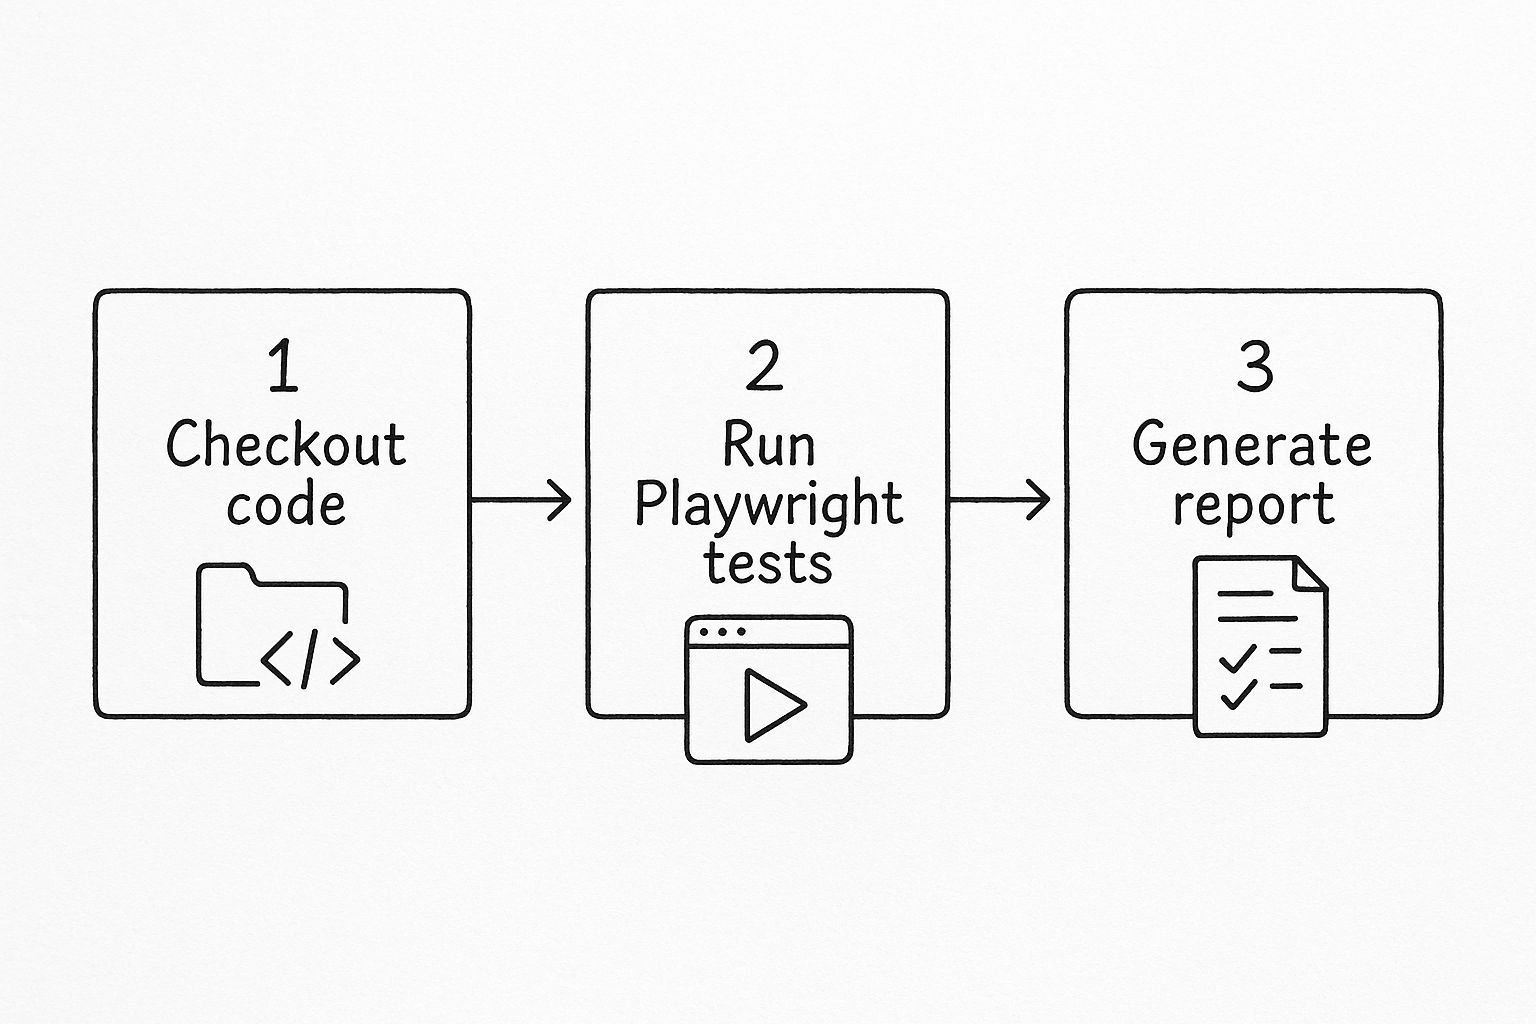
As the diagram shows, a good CI pipeline is a straightforward sequence: get the code, run the tests, and analyze the results.
Making Test Results Accessible
One of the most valuable pieces of the default workflow is how it manages test results. The configuration includes a step to automatically upload the generated Playwright HTML report as a build artifact.
This is a game-changer. It means that after a workflow completes, you don’t have to sift through endless console logs to figure out what happened. The full, interactive HTML report is available right on the GitHub Actions summary page, accessible to your whole team with a single click.
This simple feature dramatically improves visibility and makes collaboration so much easier. A developer can see not only that a test failed but can also open the detailed trace to understand exactly why.
If you're looking to build more advanced configurations, you can explore detailed guides on Playwright automation testing to further tighten your CI/CD feedback loop. Automating this reporting step truly makes quality assurance a shared, transparent responsibility for the entire team.
Common Questions About the Playwright Testing Tool
As teams start to get their hands dirty with Playwright, a few questions almost always come up. Getting those answered quickly helps smooth out the learning curve and keeps the momentum going. Think of this as your quick-reference guide for the most common things people ask.
Can Playwright Test More Than Just Web UIs?
Absolutely. While the testing tool Playwright is famous for its rock-solid end-to-end browser automation, its power goes way deeper. It comes with a fantastic API testing feature that lets you send HTTP requests directly to your backend services.
This is a game-changer for a few real-world scenarios:
- Seeding Data: You can use an API call to create a user or set up specific data in your database before a UI test even starts.
- Verifying Actions: After a UI action runs, you can fire off an API call to double-check that the right changes happened on the backend.
- Cleanup: Once a test is done, you can run API requests to delete any test data, leaving the environment pristine for the next run.
This hybrid approach—mixing UI and API tests in the same suite—gives you far more comprehensive coverage than just clicking around on the front end.
How Does Playwright Compare to Selenium or Cypress?
Playwright was built by a team that lived through the pain points of older frameworks and set out to fix them. When you really dig into what Playwright testing is, it's clear it was designed for the modern web from the ground up.
Compared to Selenium, its entire architecture is more modern. Killer features like auto-waits are baked right in, which dramatically cuts down on flaky tests without needing to litter your code with manual sleep() commands. And unlike Cypress, which has its browser limitations, Playwright delivers true cross-browser support for Chromium, Firefox, and WebKit (the engine behind Safari) all through one consistent API.This means you write a single test script and can run it with confidence across the three big browser engines without any tweaks. That’s a massive win for ensuring your application works for everyone, everywhere.
Is Migrating Existing Tests to Playwright Difficult?
The difficulty really depends on what you're moving from, but Playwright has some tools that make the whole process surprisingly manageable. The intuitive API and top-notch documentation are a great start, but the Codegen tool is the real star of the show.
You can literally walk through an old test scenario in your application while running Codegen. It watches your actions and spits out the equivalent Playwright script for you. This isn't just about speeding up the migration; it's a fantastic way for your team to learn Playwright's best practices by seeing them generated in real time.
At Mergify, we're all about creating efficient and reliable developer workflows. Our platform helps you automate pull request management, slash CI costs, and keep your codebase stable and secure. This frees up your team to focus on what really matters: building great things. Learn how Mergify can streamline your code integration process.