Best Testing Framework for Java: Top 7 Tools

Streamlining Java Development With the Right Testing Framework
In the fast-paced world of Java development, where agility and quality are paramount, robust testing is essential. Building reliable and maintainable applications requires a comprehensive testing approach, and choosing the right framework is key. Are you struggling with slow, unreliable tests? Is achieving high test coverage a challenge? Looking to seamlessly integrate testing into your CI/CD pipeline? The right Java testing framework can address these issues, streamlining your workflow, improving code quality, and catching bugs early, saving you time and resources.
Choosing a framework can feel overwhelming. Factors like project size, team expertise, integration with existing tools, desired test coverage, and budget all play a role. An effective framework should be easy to learn, provide features for various testing needs (unit, integration, functional, etc.), offer robust reporting and debugging, and integrate smoothly with your build tools and CI/CD pipeline. Some frameworks are open-source and free, while others offer commercial licenses with additional features and support. Technical considerations include compatibility with different Java versions, IDE support, and the availability of community resources and documentation.
Exploring the Top Java Testing Frameworks
This article explores the top 7 Java testing frameworks shaping software testing in 2025. We'll delve into their strengths, weaknesses, and ideal use cases to help you choose the perfect tools to enhance your Java development process. We’ll cover a range of options, from established frameworks to newer tools, catering to various testing needs and project requirements, empowering you to build high-quality, robust Java applications.
1. JUnit 5
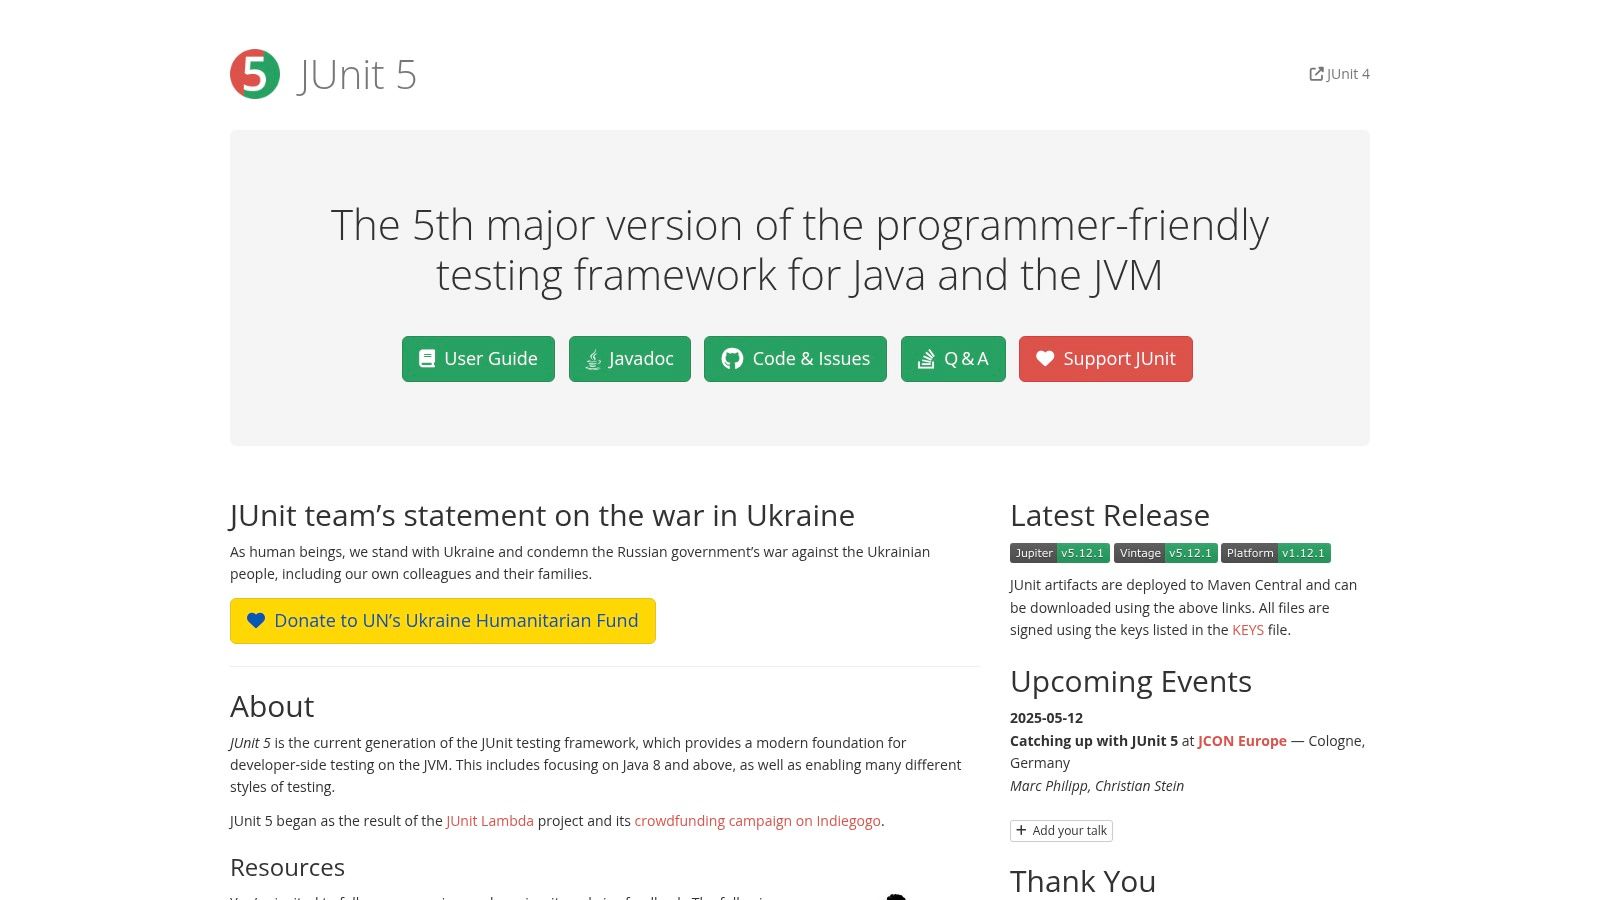
JUnit 5 is a leading Java testing framework, popular for its widespread use, modern features, and robust ecosystem. As the successor to JUnit 4, it embraces Java 8 features and beyond, giving developers a flexible and powerful platform for testing. JUnit 5 offers the tools you need to guarantee code quality and reliability, whether you're building a microservice, a complex enterprise application, or a simple utility library.
JUnit 5 isn't a single library, but a set of modules:
- JUnit Platform: This is the base for launching testing frameworks on the JVM.
- JUnit Jupiter: This module provides the new programming model and extension model for creating tests. It includes annotations like
@Test,@BeforeEach,@AfterEach, and more. - JUnit Vintage: This allows your existing JUnit 4 tests to run on the JUnit 5 platform, ensuring backward compatibility during a migration.
Several key features distinguish JUnit 5:
- Java 8+ Support: Use lambda expressions and streams for cleaner, more expressive tests.
- Nested Tests: Organize tests into logical groups for better readability and structure.
- Parameterized Tests: Run a single test with various inputs to reduce code duplication and expand test coverage. Data sources can be anything from simple values to CSV files.
- Extensions: Customize how tests execute, such as enabling conditional execution, dependency injection, and custom reporting.
- Improved Annotations: Benefit from clearer and more versatile annotations for setting up, executing, and tearing down tests.
Pros and Cons of JUnit 5
Pros:
- Strong Community Support: Access a large community and readily available resources.
- Excellent IDE Integration: JUnit 5 seamlessly integrates with popular IDEs like IntelliJ IDEA, Eclipse, and NetBeans.
- Modular Architecture: Select only the components your project needs, avoiding extra dependencies.
- Comprehensive Documentation: Extensive, well-maintained documentation simplifies learning and using JUnit 5.
Cons:
- Migration from JUnit 4: While JUnit Vintage is helpful, migrating existing projects can still take time.
- Learning Curve: Advanced features, like extensions, may present a learning curve for beginners.
- Verbosity: JUnit 5 can feel more verbose than newer, minimalist frameworks for very basic test cases.
Implementing JUnit 5
Here are some tips for getting started with JUnit 5:
- Add the necessary JUnit 5 dependencies to your project's build file (e.g., Maven's
pom.xmlor Gradle'sbuild.gradle). - Use the
@DisplayNameannotation to write descriptive names for your test classes and methods. - Explore parameterized tests to minimize redundant code and increase test coverage.
- Use the extension model to adapt JUnit 5 to your specific requirements.
For more software development best practices, check out the Mergify Blog Posts.
Website: https://junit.org/junit5/
JUnit 5 is a vital tool for Java developers dedicated to writing quality, maintainable code. Its broad range of features, wide adoption, and strong community support make it a powerful option for testing Java applications of any size and complexity.
2. TestNG
TestNG is a powerful testing framework for Java, drawing inspiration from JUnit and NUnit, but significantly expanding on their features. Its flexibility and robust feature set make it a valuable asset for various testing needs, particularly in complex enterprise environments. While JUnit may suffice for simpler projects, TestNG excels when dealing with intricate dependencies, parallel execution, and demanding reporting requirements.
TestNG is built to handle a wide range of testing, from unit testing individual components to complex integration and end-to-end tests. This versatility makes it a suitable choice for teams using different development methodologies, like Agile and Waterfall.
Key Features and Benefits
TestNG offers a rich set of features designed to streamline the testing process and improve overall efficiency.
- Flexible Test Configuration with Annotations: TestNG uses annotations (
@Test,@BeforeTest,@AfterTest, etc.) to define test methods, setup procedures, and teardown operations. This offers precise control over the test lifecycle. - Data-Driven Testing and Parameterization: Execute the same test logic with various inputs using data providers. This is essential for comprehensive test coverage and validating different scenarios.
- Parallel Test Execution: Drastically reduce testing time by running tests concurrently across multiple threads or machines. This is especially beneficial for large test suites in CI/CD pipelines.
- Dependency Testing: Establish dependencies between test methods, enabling the creation of complex test workflows where execution order is critical. This is invaluable for integration and end-to-end testing.
- Built-in Multithreaded Testing Support: TestNG provides strong support for testing multithreaded code, simplifying the identification of concurrency problems.
- Excellent Reporting: Generate detailed HTML reports, including logs, passed/failed test summaries, and execution times, enabling quick analysis of test results.
Pros and Cons of Using TestNG
Like any tool, TestNG has its strengths and weaknesses.
Pros:
- Handles Complex Scenarios: Efficiently manages complex testing requirements, making it particularly useful for large enterprise applications.
- Superior Test Grouping and Dependencies: Provides robust mechanisms for organizing tests and managing dependencies, leading to structured and well-organized test suites.
- Comprehensive Reporting: Offers detailed reports for rapid analysis and issue identification.
- Seamless Integration: Integrates well with popular build tools like Maven and Gradle and CI/CD systems.
Cons:
- Steeper Learning Curve: Can be initially more challenging to learn than JUnit, especially for developers new to testing frameworks.
- Smaller Community: TestNG has a smaller community and fewer resources compared to JUnit, although it is growing.
- Configuration Complexity: Configuring complex testing scenarios can be difficult for beginners.
Implementation and Setup Tips
Here are a few tips to get started with TestNG:
- Use a build tool like Maven or Gradle to manage dependencies and simplify the setup process.
- Begin with simple test cases and progressively explore advanced features such as data providers and parallel execution.
- Utilize the comprehensive TestNG documentation and online resources to learn best practices.
Pricing and Technical Requirements
TestNG is open-source and free to use. It requires Java to be installed.
Website: https://testng.org/
Conclusion
TestNG is a valuable tool for teams needing a robust and flexible testing framework to handle complex scenarios. While JUnit may be simpler for smaller projects, TestNG's advanced features make it an excellent choice for teams developing and maintaining enterprise-level applications where thorough testing, parallel execution, and dependency management are paramount.
3. Mockito
Mockito is a popular mocking framework for Java. While not a complete testing framework on its own, it integrates smoothly with tools like JUnit and TestNG, allowing developers to isolate code units for comprehensive testing. This isolation is key for effective test-driven development (TDD), ensuring that unit tests remain focused on specific logic, free from external dependencies.
Imagine testing a service connected to a database. Direct interaction with the database during each test can be cumbersome. Mockito simplifies this by allowing you to mock the database connection and define specific responses, which speeds up testing and improves reliability.
Key Features and Benefits
Mockito offers several advantages for developers:
- Simple API: A clean and intuitive API makes creating and managing mock objects easy, resulting in more readable and maintainable tests.
- Verification and Stubbing: Verify that methods were called with specific arguments and stub methods to return predefined values, giving you granular control over your mock objects.
- Spy Capabilities: Partially mock real objects, providing a flexible way to balance real implementation testing with controlled behavior.
- Annotations: Annotations like
@Mock,@Spy, and@InjectMocksreduce boilerplate code, making test classes more concise. - Integrations: Seamless integration with JUnit and TestNG ensures compatibility with existing testing workflows.
- Community Support: Mockito enjoys active community support, ensuring ongoing development and readily available assistance.
Pros and Cons of Using Mockito
Here’s a quick overview of Mockito's strengths and weaknesses:
Pros:
- Readable syntax improves test maintainability.
- Minimal overhead and boilerplate code streamline test creation.
- Smooth integration with JUnit.
- Active community and ongoing development.
Cons:
- Requires a separate testing framework like JUnit.
- Mocking final classes and static methods needs extensions like PowerMockito.
- Potential for brittle tests if mocking isn't applied carefully.
Practical Applications
Mockito can be used in several testing scenarios:
- Unit Testing: Isolate and test individual units of code.
- Test-Driven Development: Create mock objects before actual implementation, facilitating the TDD workflow.
- Integration Testing: Mock specific components within integration tests.
You might be interested in: Our guide on sitemaps.
Implementation Tips
Consider these tips for effective Mockito usage:
- Focused Mocking: Mock only essential dependencies to maintain test clarity.
- Avoid Over-Mocking: Balance mocking with real implementation testing.
- Judicious Spy Usage: Employ spies carefully to maintain a clear separation between real and mocked behavior.
Website: https://site.mockito.org/
Mockito is a valuable asset for Java developers focused on TDD or building well-tested code. Its ease of use, rich features, and integration with existing testing frameworks make it an essential part of the Java testing landscape.
4. Spock Framework
Spock is a unique testing framework. It combines powerful features with an expressive syntax, all while prioritizing readability. Known for its use with Groovy, Spock integrates seamlessly into Java projects. This provides a welcome alternative to traditional Java testing frameworks like JUnit. Spock helps create maintainable tests that also act as living documentation.
Spock is a testing and specification framework for Java and Groovy applications. It leverages Groovy's dynamic nature to create a more expressive and readable testing experience. Tests written in Spock are often more concise and easier to understand than similar tests written in pure Java. This is especially helpful for teams practicing Behavior-Driven Development (BDD). Spock's structure naturally aligns with specifying and verifying how an application behaves.
Key Features and Benefits
Spock offers several advantages for developers:
- Expressive Specification Language: Spock uses Groovy to provide a descriptive and structured approach to defining tests. Keywords like
given,when,then,expect, andwheremake tests easy to follow, even for non-technical team members. - Built-in Mocking and Stubbing: Spock handles mocking and stubbing internally. This simplifies isolating units under test and managing their dependencies. It also streamlines the testing process, reducing the need for external mocking libraries.
- Data-Driven Testing: Spock's data tables make data-driven testing straightforward. You can easily run the same test with multiple inputs. This is highly effective for testing different scenarios and edge cases without repetitive code.
- Interaction Testing: Spock excels at testing how components interact. Verify method calls, argument values, and the order of interactions. This is vital for ensuring different parts of your application communicate correctly.
Pros and Cons of Using Spock
Like any tool, Spock has both strengths and weaknesses.
Pros:
- Highly Readable Test Code: The structured approach and Groovy syntax create clear, concise, and easily understood test code. This code serves as effective living documentation.
- Powerful Assertion Syntax: Spock's assertions are more expressive and less verbose than traditional Java assertions.
- Integrated Mocking: Built-in mocking simplifies test setup and reduces external dependencies.
- Detailed Failure Reports: Spock provides helpful failure reports with diff output, making debugging easier.
Cons:
- Groovy Dependency: Teams focused solely on Java will need to learn Groovy.
- Java Integration: While compatible, Spock is more common in Groovy projects. This might be a barrier for Java-only teams.
- Potential Performance Overhead: The Groovy runtime can add a slight performance overhead, though this is rarely a significant issue.
Implementation and Setup Tips
Getting started with Spock is relatively simple:
- Add the Spock dependency to your project's build file (Maven, Gradle).
- Make sure your IDE supports Groovy.
- Begin with simple tests to learn the Groovy syntax and Spock's structure.
- Use Spock's data tables for efficient data-driven testing.
Spock vs. JUnit
While JUnit remains a popular choice, Spock offers advantages in readability and expressiveness. Spock's structured approach and built-in mocking can significantly simplify test code. The Groovy dependency is a factor for Java-only teams to consider.
Pricing and Technical Requirements
Spock is open-source and free to use. You will need a Java Development Kit (JDK) and a Groovy environment.
Website
Spock is a powerful testing framework that can greatly improve the readability and maintainability of your tests. While learning Groovy may require a small investment, the benefits in test clarity and efficiency often outweigh the effort. If you're looking to improve your testing practices and adopt BDD principles, Spock is a strong option.
5. AssertJ
AssertJ stands out for its ability to make Java testing clearer and easier to maintain. It's not a testing framework on its own, but it works well with popular frameworks like JUnit or TestNG. AssertJ provides a wide range of fluent assertions, which improve the expressiveness and understandability of test code. This is especially helpful in larger projects where tests can become quite complex.
AssertJ's fluent API allows you to create a chain of assertions, resulting in highly readable test cases. Instead of writing multiple lines of traditional assertions, you can express multiple conditions in a single, concise statement. This not only improves clarity but also reduces the amount of boilerplate code.
Features
- Fluent Assertion API: This allows you to write assertions in a more natural and readable style.
- Rich Set of Assertions: AssertJ handles a wide variety of scenarios. These include standard data types, collections, exceptions, and even custom types.
- Detailed Error Messages: When tests fail, AssertJ provides detailed error messages that help you quickly pinpoint the cause, saving you debugging time.
- Java 8 Support: AssertJ uses Java 8 features such as lambdas and streams for more concise and expressive assertions.
- Extensible Design: You can create custom assertions to fit your specific project needs, providing maximum flexibility.
Practical Applications
- Validating API Responses: Verify the content and structure of JSON or XML responses effortlessly.
- Testing Business Logic: Express complex business rules in your tests with clarity.
- UI Testing: Combine AssertJ with UI testing frameworks for robust and readable UI tests.
- Database Testing: Ensure data integrity and consistency after database operations.
Pros
- Improved Test Readability: The fluent API significantly increases the readability and maintainability of tests.
- Comprehensive Assertions: The wide array of assertion methods covers almost any testing scenario.
- Excellent IDE Support: IDE code completion makes writing assertions quick and efficient.
- Active Maintenance: Regular updates ensure compatibility with the latest Java versions and libraries.
Cons
- Not a Standalone Framework: Requires integration with JUnit or TestNG.
- Learning Curve: The extensive API requires some time to learn and master.
- Potential Verbosity: For very simple checks, fluent assertions can be slightly longer than traditional methods.
Implementation/Setup Tips
- Add the AssertJ dependency to your project's
pom.xml(Maven) orbuild.gradle(Gradle) file. - Import the necessary AssertJ classes into your test classes.
- Begin writing fluent assertions using the
assertThat()method.
Comparison with Similar Tools
Libraries like Hamcrest also offer assertion capabilities. However, AssertJ's fluent API and wider range of assertions generally lead to a more readable and maintainable testing experience. Hamcrest's matcher-centric approach can be less intuitive for some.
Pricing and Technical Requirements
AssertJ is open-source and free to use under the Apache 2.0 license. It requires Java 7 or higher.
Website
https://assertj.github.io/doc/
AssertJ can significantly improve your Java tests by making them more readable, maintainable, and expressive. Its seamless integration with existing testing frameworks and its comprehensive features make it a valuable asset for any Java project. If you want to improve your testing practices and spend less time debugging, AssertJ is a powerful tool to consider.
6. Cucumber-JVM
Cucumber-JVM is the Java implementation of Cucumber, a popular tool for Behavior-Driven Development (BDD). It helps bridge the gap between technical and non-technical team members by using Gherkin, a plain-language format for executable specifications. This makes Cucumber-JVM a powerful asset for Java projects aiming to improve collaboration and maintain up-to-date documentation.
Features and Benefits
Cucumber-JVM offers a range of features to support effective BDD:
- BDD with Gherkin: Using keywords like
Given,When, andThen, Gherkin allows scenarios to be described from a user's perspective. This promotes a focus on the system's intended behavior. - Living Documentation: Gherkin feature files act as continuously updated system documentation, eliminating the need for separate, static documents that quickly become outdated.
- Collaboration: Cucumber-JVM facilitates a shared understanding among developers, QA, and business stakeholders, allowing everyone to contribute to and comprehend test scenarios.
- Integration with JUnit and TestNG: It integrates seamlessly with popular Java testing frameworks like JUnit and TestNG, allowing teams to build on their existing testing infrastructure.
- Reusable Step Definitions: Define common steps once and reuse them across multiple scenarios, minimizing code duplication.
- Data Tables and Scenario Outlines: Support for parameterized testing allows you to test a single scenario with various inputs.
- Multiple Languages and Formats: Cucumber supports multiple languages, promoting consistency across projects involving different linguistic contexts.
Pros and Cons
Like any tool, Cucumber-JVM has its advantages and disadvantages:
Pros:
- Enhanced collaboration and communication across different project roles.
- Tests serve as living documentation, reducing maintenance efforts.
- Fosters a user-centric approach to development.
- Strong support for parameterized testing.
Cons:
- Maintaining feature files and step definitions can introduce some overhead.
- May be excessive for simple unit tests where a simpler framework might be sufficient.
- Requires discipline and adherence to best practices to prevent an unwieldy step definition library.
Comparison with Similar Tools
While frameworks like JUnit and TestNG focus on unit testing, Cucumber-JVM shines in integration and acceptance testing, emphasizing behavior verification. Tools like Spock offer BDD support but use a Groovy-based syntax, whereas Cucumber-JVM uses Gherkin and Java.
Implementation and Setup Tips
Here are a few tips for getting started with Cucumber-JVM:
- Add the Cucumber-JVM and JUnit/TestNG dependencies to your project.
- Create feature files in Gherkin syntax to describe the desired system behavior.
- Implement step definitions in Java to connect Gherkin steps to the actual code.
- Integrate Cucumber-JVM into your CI/CD pipeline for automated test execution.
Pricing and Technical Requirements
Cucumber-JVM is open-source and free. It requires a Java Development Kit (JDK) and integrates with build tools like Maven and Gradle.
Website
Cucumber-JVM's strength lies in its ability to promote collaboration and generate living documentation, making it a valuable tool for teams practicing BDD. By centering on user behavior and clear communication, Cucumber-JVM fosters a shared understanding of the system, ultimately contributing to more robust and maintainable software.
7. Selenium With JUnit/TestNG

Selenium is a powerful browser automation tool. When combined with Java testing frameworks like JUnit or TestNG, it becomes an industry-standard solution for automated testing of web applications. This potent combination earns a spot on our list due to its cross-browser compatibility and rich ecosystem. Teams can thoroughly evaluate their web applications across various browsers and platforms, ensuring a smooth and reliable user experience.
Selenium itself is open-source and free. However, integrating it with other tools, like cloud-based testing platforms, may have associated costs. The basic technical requirements include the Java Development Kit (JDK), your chosen testing framework (JUnit or TestNG), Selenium libraries, and the necessary browser drivers.
Using Selenium WebDriver and the Page Object Model
Selenium WebDriver, the core API, allows developers to control browser actions programmatically. This simulates user interactions such as clicking buttons, filling forms, and navigating pages. The Page Object Model (POM) design pattern, frequently used with Selenium, improves maintainability. It abstracts web page elements and actions into reusable objects. This structure makes tests less fragile and simpler to update when the UI changes. For further insights on development tools, you might find Mergify Sitemaps helpful.
Key Features of Selenium with JUnit/TestNG
- Cross-Browser Testing: Supports major browsers like Chrome, Firefox, Edge, Safari, and Internet Explorer.
- Page Object Model Support: Encourages clean, maintainable tests.
- WebDriver API: Offers a comprehensive set of methods for browser automation.
- JavaScript Execution: Enables running JavaScript within the browser for advanced interactions.
- Wait Mechanisms: Efficiently handles dynamic web elements and asynchronous operations.
Advantages of Using Selenium
- Industry Standard: Widely adopted and recognized, with a large community and ample resources.
- Multi-Browser and Platform Support: Guarantees consistent application performance across diverse environments.
- Rich Ecosystem: Numerous plugins, extensions, and integrations are readily available.
- CI/CD Integration: Seamlessly integrates with continuous integration/continuous deployment pipelines for automated testing workflows.
Potential Drawbacks
- Test Brittleness: Changes to the UI can necessitate test updates, requiring ongoing maintenance.
- Slower Execution: Selenium tests tend to be slower than unit or integration tests due to browser interactions.
- Browser Driver Management: Setting up and maintaining browser drivers can be tedious.
- Learning Curve: Mastering Selenium and associated frameworks requires some initial learning and hands-on practice.
Practical Implementation Tips
- Build Tools: Use a build tool like Maven or Gradle for managing dependencies and project setup.
- Page Object Model: Implement the Page Object Model to write maintainable and reusable test code.
- Wait Mechanisms: Incorporate robust wait mechanisms to manage asynchronous operations and dynamic elements.
- Browser Developer Tools: Utilize browser developer tools to inspect web elements and understand their properties.
- CI/CD Integration: Integrate Selenium tests into your CI/CD pipeline for automated execution and feedback.
Selenium with JUnit/TestNG provides a comprehensive and robust solution for web application testing. It’s a valuable tool for ensuring software quality and reliability. However, it’s important to be aware of the potential challenges. Investing time in proper setup and maintenance is key for optimal results. By effectively using its features and adhering to best practices, development teams can achieve significant enhancements in their web testing processes.
Java Testing Frameworks: Head-to-Head Comparison
| Item | Core Features ✨ | Developer Experience ★ | Unique Selling Points 🏆 | Target Audience 👥 | Pricing 💰 |
|---|---|---|---|---|---|
| JUnit 5 | Java 8 support, Nested & Parameterized tests | Excellent IDE integration, Extensive docs | Modular design, Wide industry adoption | Java developers, Enterprise teams | Free |
| TestNG | Flexible annotations, Data-driven & Parallel execution | Robust reporting, Dependency testing | Enterprise focus, Advanced configuration | Enterprise testers, Complex projects | Free |
| Mockito | Simple API, Easy mock creation | Clean syntax, Minimal boilerplate | Seamless integration with JUnit/TestNG | Unit testers, Developers | Free |
| Spock Framework | Expressive Groovy syntax, Data tables | Readable tests, Detailed failure reports | Combined mocking & testing framework | Groovy/Java teams | Free |
| AssertJ | Fluent assertions, Rich assertion library | Improves readability, Clear error messages | Enhances JUnit/TestNG experience | Developers seeking clarity | Free |
| Cucumber-JVM | BDD with Gherkin, Reusable step definitions | Living documentation, Promotes collaboration | Bridges technical & non-technical team gaps | Cross-functional teams | Free |
| Selenium with JUnit/TestNG | Cross-browser automation, Page Object Model support | Industry standard, Extensive ecosystem of tools | Robust web testing with CI/CD integration | Web QA teams, Automation engineers | Free |
Elevating Your Java Testing Strategy
Choosing the right Java testing framework hinges on several factors. These include project size, your team's expertise, and the specific needs of your testing process. For unit testing, JUnit and TestNG are popular choices. JUnit 5, in particular, is favored for its modern and extensible architecture. For mock testing, Mockito and Spock facilitate isolated unit testing by making it easy to simulate dependencies.
AssertJ simplifies assertions, making tests easier to read and understand. Meanwhile, Cucumber-JVM supports Behavior-Driven Development (BDD) using its Gherkin syntax, making tests more accessible to non-technical stakeholders. Finally, for UI testing, integrating Selenium with JUnit or TestNG offers a robust solution.
Getting started with these frameworks is generally straightforward. Most provide comprehensive documentation and a wealth of examples. Start by adding the necessary dependencies to your project. Then, write some basic test cases and gradually incorporate more advanced features. These could include parameterized tests, test suites, and mocking.
Budget and resources are also essential considerations. While many of these frameworks are open-source, factor in the potential costs of training your team, integrating with your existing toolset, and ongoing maintenance. Compatibility with your current development environment is crucial. This includes your build tools, IDEs, and CI/CD pipelines to ensure seamless integration. Select frameworks that align with your existing tech stack and avoid introducing unnecessary complexity.
Key Considerations for Java Testing Frameworks
Here's a summary of key Java testing frameworks and their strengths:
| Framework | Description |
|---|---|
| JUnit & TestNG | Core unit testing frameworks. JUnit 5 is favored for its modern approach. |
| Mockito & Spock | Excellent for mocking and stubbing dependencies. |
| AssertJ | Improves test readability with fluent assertions. |
| Cucumber-JVM | Enables BDD and collaboration with non-technical stakeholders. |
| Selenium | Industry standard for UI testing. |
Effective testing is vital for delivering high-quality Java applications. However, merging code, maintaining CI stability, and dealing with infrastructure issues can affect your testing efficiency and overall development speed. Mergify helps to streamline your code integration process, lower CI costs, and allows developers to focus on building great software. It achieves this through its intelligent merge queue, automated merge protections, and AI-powered CI issue detection.