A Guide to Modern Playwright API Testing


Most people think of Playwright as a tool for browser automation, and they're not wrong. But if you're only using it for UI tests, you're missing out on one of its most powerful features: the APIRequestContext. This transforms Playwright into a first-class citizen for backend testing.
By bringing UI and API tests under one roof, you can build a more cohesive and efficient testing strategy that genuinely reflects how your application works.
Why Playwright Is a Game-Changer for API Testing
Before we jump into the code, it’s worth understanding why so many developers are moving beyond traditional tools and embracing Playwright for more than just browser interactions. The real magic is in its unified architecture, which radically simplifies modern testing workflows by letting you do more with a single framework.

Traditionally, API testing meant firing up a separate tool like Postman or using a library like REST Assured. This approach works, but it creates a disconnect. You end up with one set of tests validating the frontend and a completely separate suite for the backend. This separation often leads to duplicated effort, a heavier maintenance load, and gaps in your test coverage.
The Power of a Unified Context
Playwright cuts through this complexity with its APIRequestContext. Don't mistake this for just another simple HTTP client. It’s a persistent, cookie-aware context that can perfectly mirror a real user's session.
Think about a common test scenario: a user logs in through the UI, and you then need to check a series of API calls that require that user's authentication cookie. With the old way of doing things, you'd have to awkwardly capture the token or cookie from the browser and manually inject it into your API requests. It's clunky and prone to breaking.
Playwright handles this seamlessly.
Key Takeaway: Playwright’s ability to share the authentication state between the browser (page) and API (request) contexts is its killer feature. It lets you write true end-to-end tests that follow an actual user journey from the UI to the API and back again.
This integrated approach gives you some immediate, tangible benefits:
- Simplified Test Scenarios: You can write a single test file that logs in through the UI and then makes authenticated API calls. No more juggling different tools or contexts.
- Reduced Flakiness: By sharing a context and handling waits automatically, you minimize the race conditions and authentication headaches that plague decoupled test suites.
- Increased Efficiency: Say goodbye to managing multiple testing frameworks and their separate configurations. For a deeper dive, our guide on general Playwright testing strategies explores this further.
To put it in perspective, here's a quick look at how Playwright stacks up against the old guard.
Playwright vs Traditional API Testing Tools
| Feature | Playwright API Testing | Traditional API Tools (e.g., Postman, REST Assured) |
|---|---|---|
| Test Scope | Unified UI and API testing in a single framework. | Dedicated to API testing only; requires separate UI tools. |
| Authentication | Seamlessly shares authentication state (cookies, tokens) between browser and API contexts. | Requires manual extraction and injection of auth tokens. |
| Context | Mimics a complete user session, including browser state. | Context is limited to isolated HTTP requests. |
| Setup | Single setup for the entire test suite. | Requires separate setup and configuration from UI tests. |
| Developer Experience | Write tests in familiar languages (JS/TS, Python) with a consistent API. | Varies by tool; can involve different languages or UI-based workflows. |
This table really drives home the core advantage: Playwright offers a holistic view of your application's quality, whereas traditional tools provide a more siloed perspective.
Industry Adoption and Performance
This shift toward unified frameworks isn't just theoretical; the numbers back it up. Playwright has rocketed to the front of the pack, with a 45.1% adoption rate among testers in 2024-2025, quickly outpacing older, more specialized tools.
This growth isn't just hype. It's fueled by real-world results—teams consistently report faster test execution and more stable, reliable outcomes. For anyone working in a complex and fast-moving development cycle, that kind of stability is pure gold.
Setting Up Your API Testing Environment
A solid setup is the foundation of any test suite that's built to last. Before you can really dig into Playwright API testing, you need to get your project organized. Trust me, spending a little time on this now prevents a world of headaches later and ensures your tests are maintainable, flexible, and easy for anyone on your team to jump into.
Getting started is refreshingly simple. First, create a new directory for your project and hop into it. From there, you can kick off a new Playwright project with a single command:
npm init playwright@latest
This command starts an interactive setup process. It'll ask whether you prefer TypeScript or JavaScript, what you want to name your tests folder, and even offer to add a GitHub Actions workflow right out of the box. For any modern project, I highly recommend choosing TypeScript. Its type safety is a lifesaver when you start dealing with complex API response payloads.
This is what you'll see on the official Playwright site, highlighting just how easy it is to get going.
The screenshot really drives home a key selling point: Playwright is a unified tool for cross-browser, cross-platform automation, and that includes its powerful API testing features.
Configuring for Success
Once the initialization is done, the most important file you'll touch is playwright.config.ts. Think of it as the control center for your entire testing operation. When you're focused on API testing, the first and most critical setting to configure is the baseURL.
// playwright.config.ts import { defineConfig } from '@playwright/test';
export default defineConfig({ use: { // All API requests will now be relative to this URL baseURL: 'https://api.yourapp.com', }, });
By setting the baseURL, you avoid hardcoding the full URL in every single test. You can just make requests to endpoints like /users or /products, and Playwright figures out the rest. This small change makes switching between different environments—like dev, staging, and production—an absolute breeze.
Pro Tip: Never, ever commit sensitive data like API keys or environment-specific URLs directly into your configuration file. A much better approach is to use a.envfile to manage these secrets and load them dynamically into yourplaywright.config.tsfile.
A Clean Project Structure
A logical folder structure is crucial for keeping your tests organized as the project grows. I’ve found a simple yet effective layout to start with that scales really well:
tests/: This is home base for all your test files (your.spec.tsfiles). I like to organize this further by API resource, liketests/users.spec.tsortests/auth.spec.ts.utils/: The perfect spot for any reusable helper functions. For instance, you could create a helper here to handle authentication logic that returns an authenticated API request context for your tests.fixtures/: Store your mock data or predefined request payloads in here. This keeps your test files clean and focused purely on the test logic itself, not on data setup.
Putting this structure in place early on creates a scalable system for your Playwright API testing suite. It means that when new team members join, they can find what they need and start contributing right away without having to untangle a messy web of files. That initial investment in organization pays off big time down the line.
Writing Your First Playwright API Test
Alright, with your environment ready to go, it’s time to get your hands dirty and write some code. The good news is that writing API tests in Playwright feels surprisingly natural, and it all revolves around the request fixture. We'll kick things off with the basics—fetching and validating data—before jumping into more practical, real-world examples that involve creating and managing resources.
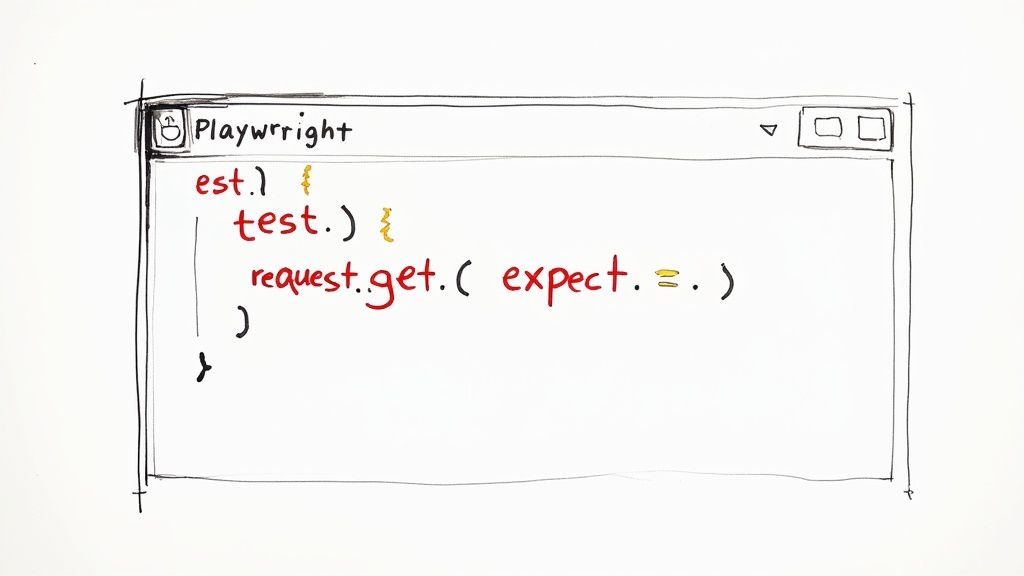
Let's start with the most common API interaction you'll ever test: a GET request. Imagine you need to verify that an endpoint for fetching user data is actually working as expected. Your first test will hit /users/1 and then use Playwright’s built-in assertions to make sure the response is correct.
Making a Simple GET Request
The request fixture is your main entry point for talking to APIs. It gives you methods like get(), post(), put(), and delete() that map directly to the standard HTTP verbs you already know.
Here’s what a simple test looks like when you want to retrieve data for a single user:
import { test, expect } from '@playwright/test';
test('should fetch a single user', async ({ request }) => { const response = await request.get('/users/1');
// Check that the response was successful expect(response.ok()).toBeTruthy();
// Validate the response status code expect(response.status()).toBe(200);
// Assert against the response body const body = await response.json(); expect(body).toHaveProperty('id', 1); expect(body).toHaveProperty('name', 'Leanne Graham'); });
This test is clean, readable, and its intention is crystal clear. We first check if the request was successful with response.ok(), a fantastic little helper for any status code in the 200-299 range. From there, we get more specific, asserting against the exact status code and the JSON payload. While this is great for simple cases, most real-world workflows involve creating data, not just reading it.
Creating Resources with POST Requests
Now for a more dynamic scenario: sending a POST request to create a new resource. This is a classic use case, like adding a new product to an e-commerce store or posting a comment on a blog.
This means you’ll need to send a JSON payload in the request body. Here’s how you could test an endpoint for creating new posts at /posts:
test('should create a new post', async ({ request }) => { const newPost = { title: 'My Awesome New Post', body: 'This is the content of the post.', userId: 1, };
const response = await request.post('/posts', { data: newPost, });
expect(response.status()).toBe(201); // 201 Created const body = await response.json(); expect(body).toMatchObject(newPost); });
See how we pass the payload using the data option? Playwright is smart enough to automatically set the Content-Type header to application/json for you, which keeps the code lean.
Key Takeaway: UsingtoMatchObjectis a game-changer for POST requests. It confirms that the response body includes all the properties from ournewPostobject, but it won't fail if the API adds extra fields on its own, like a newid. It’s flexible and robust.
This pattern of creating data is fundamental to so many testing strategies. If you have experience with Python, you might notice some similarities in how testing frameworks approach assertions. You can see these parallels when exploring how to use pytest in Python for structuring tests. These core testing principles often carry over, no matter the language or tool.
By combining GET and POST requests, you can start building out a really solid test suite for all of your application’s CRUD (Create, Read, Update, Delete) operations. This is the foundation of a complete Playwright API testing strategy.
Handling Authentication and Complex Scenarios
Once you move past simple GET and POST requests, you’ll quickly run into the real-world complexities of API testing. The biggest hurdle? Authentication.
Public APIs are the exception, not the rule. Most of your work will involve protected endpoints that require you to prove your identity before they'll even consider your request. This is where Playwright’s more advanced features really come into play, giving you the tools to manage authentication flows and other tricky situations without tearing your hair out.
The most common pattern you'll face is bearer token authentication. It’s a straightforward dance: you make an initial login request with some credentials, the server sends back an access token, and you include that token in the Authorization header for every request that follows.
Managing Authentication with storageState
Logging in manually at the start of every single test is a huge time sink. If you have a suite of 50 tests that all need an authenticated user, those repetitive login calls will bog down your entire workflow. It’s slow, inefficient, and clutters your test code.
This is exactly the problem Playwright's storageState was designed to solve. It lets you perform the login once, save the entire authentication state (cookies, local storage, tokens, and all), and then reuse that state across every test in your suite.
You simply create a global setup file that handles the login, saves the state to a file, and then each test starts up as if it's already logged in.
Key Insight: Using storageState is probably the single biggest performance boost you can give your API test suite. It completely decouples authentication from your actual test logic, which makes your tests faster, cleaner, and laser-focused on what they're supposed to be validating.This approach is a big reason why Playwright's adoption has been skyrocketing. As of early 2025, over 3,000 companies—including big names like ADP and Vodafone—are using it. Its market share has grown to around 2.20% because it provides practical, elegant solutions to common testing headaches. You can dig into more of the data over at 6sense.com.
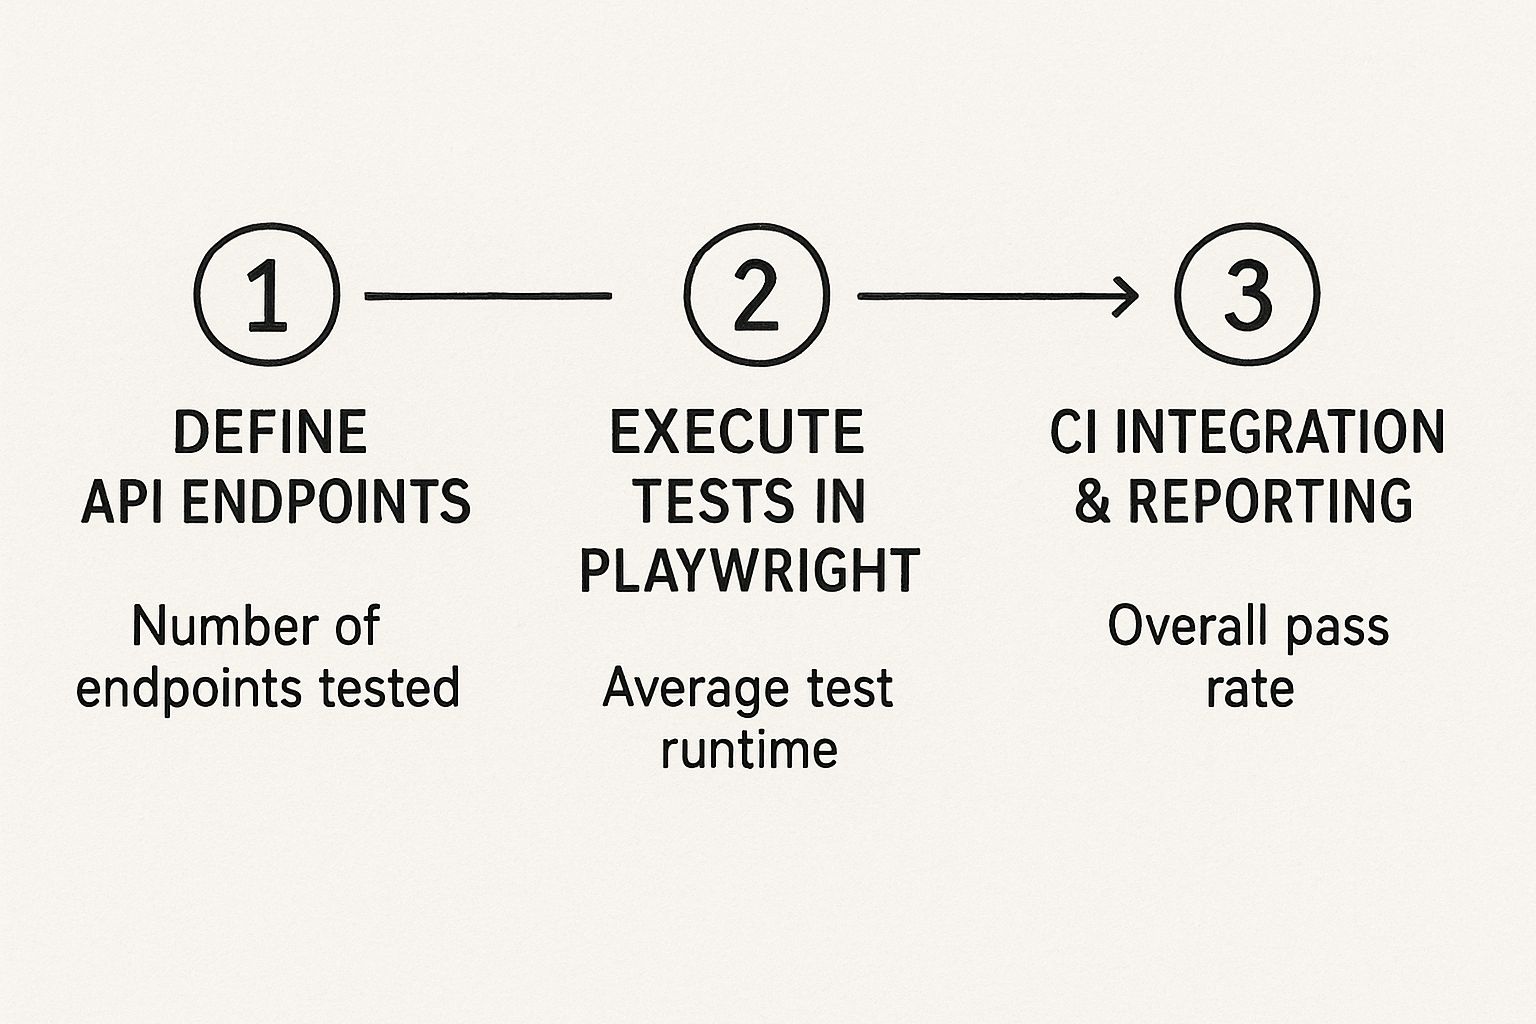
This infographic gives a high-level view of a typical API testing workflow. Notice how efficient execution is right in the middle—optimizing that step with features like storageState directly impacts how quickly you get feedback from your CI pipeline.
Handling File Uploads and Multipart Data
Another classic "complex" scenario is file uploads. This isn't as simple as sending a JSON payload; it requires constructing a multipart/form-data request, which involves breaking the data into different parts, including the raw file buffer and its metadata. It can get messy.
But again, Playwright abstracts this away beautifully. You don't have to wrestle with manually formatting the body or setting specific headers. You just point it to the file.
Here's what it looks like in practice. Let's say we're uploading a new profile picture for a user:
import { test, expect } from '@playwright/test'; import * as fs from 'fs';
test('should upload a profile picture', async ({ request }) => { const fileBuffer = fs.readFileSync('path/to/avatar.png');
const response = await request.post('/users/1/avatar', { multipart: { // 'file' is the field name the server expects file: { name: 'avatar.png', mimeType: 'image/png', buffer: fileBuffer, }, // You can also include other form fields caption: 'My new profile picture', }, });
expect(response.ok()).toBeTruthy(); });
See how clean that is? Playwright handles the low-level details of constructing the multipart/form-data request behind the scenes. This lets you focus on the intent of the test, not the boilerplate of HTTP formatting.
This kind of clean, high-level API for handling both authentication and complex data types is a core reason why so many teams are choosing to consolidate their testing efforts on Playwright.
Integrating API Tests into Your CI/CD Pipeline
So, you've written your API tests. That's a great start, but let's be honest—tests you have to remember to run manually are tests that will eventually be forgotten. The real magic happens when they become a seamless, automated part of your development workflow.
By integrating your Playwright API testing suite into a Continuous Integration/Continuous Deployment (CI/CD) pipeline, you create a powerful safety net. Every single code change gets automatically validated against your API contracts. This isn't just a nice-to-have; it's how you catch regressions instantly, long before they ever see the light of day and affect your users.
Using a platform like GitHub Actions, you can build a simple workflow that runs your test suite on every push or pull request. This gives developers immediate feedback right where they work, making it way easier to find and smash bugs on the spot.
Building a GitHub Actions Workflow
Getting started is surprisingly straightforward. You just need to create a YAML workflow file inside your project's .github/workflows/ directory. Think of this file as a recipe that tells GitHub Actions exactly what to do.
The process is pretty standard: check out the code, set up the right Node.js environment, install your project's dependencies, and then kick off the Playwright tests.
Here’s a solid, foundational example of what a playwright-api-tests.yml file might look like:
name: Playwright API Tests
on: push: branches: [ main, develop ] pull_request: branches: [ main, develop ]
jobs: test: runs-on: ubuntu-latest steps: - uses: actions/checkout@v4 - uses: actions/setup-node@v4 with: node-version: 18
- name: Install dependencies
  run: npm ci

- name: Install Playwright browsers
  run: npx playwright install --with-deps

- name: Run Playwright API tests
  run: npx playwright test
This workflow might seem simple, but it's incredibly effective. It guarantees your tests run in a clean, consistent environment every single time, giving you a reliable pulse on your API's health with every commit.
Essential CI/CD Best Practices
As your test suite and team grow, you'll want to start optimizing your pipeline to keep it fast and efficient. A few key practices I’ve found make a huge difference:
- Cache Your Dependencies: Re-downloading npm packages on every single run is a massive waste of time and resources. Use caching to store your dependencies. This can dramatically speed up your pipeline by restoring them from a previous run instead of fetching everything from scratch.
- Manage Your Secrets: Never, ever hardcode API keys, auth tokens, or other sensitive data in your code. It's a huge security risk. Instead, use your CI provider's built-in secret management tools (like GitHub secrets) and access them as environment variables in your workflow.
- Publish Test Reports: Don't let your test results get buried in a mountain of console logs. Configure your workflow to publish the Playwright HTML report as a build artifact. This gives your team a clean, visual summary of exactly what passed, what failed, and why.
A well-configured pipeline transforms your test suite from a manual checklist into an automated quality gate. It’s a core component of modern DevOps, ensuring that code quality remains high even as development velocity increases. For more insights, exploring established CI/CD best practices can help refine your strategy even further.
The push for this kind of automation isn't just a trend; it's a fundamental industry shift. The global API testing market is projected to explode from USD 1.5 billion in 2023 to a staggering USD 12.4 billion by 2033. You can see the full details of the API testing market's expansion on Market.us.
This massive growth reflects a tectonic shift toward API-first development, where reliable, automated testing tools like Playwright aren't just useful—they're becoming absolutely essential. Mastering CI integration for your tests isn't just a good skill to have; it's becoming a prerequisite for modern software teams.
Look, as more and more teams realize Playwright can do a lot more than just UI automation, some common questions always seem to pop up. It's totally natural. Moving to a single framework for everything is a game-changer, but it also means thinking about your tests in a slightly new way.
Let’s tackle a few of the most frequent questions I hear. My goal is to help you get past the initial hurdles and start writing powerful Playwright API tests with confidence.
Can I Use Playwright for Both UI and API Tests in the Same Project?
Yes, absolutely. In fact, this is one of Playwright's killer features and a huge reason why it’s gaining so much traction. You can finally stop juggling different frameworks.
Imagine a test where you first create a new user by hitting a POST endpoint. Then, in that exact same test file, you can spin up a browser and verify that the user can log in and see their dashboard. The request fixture handles all the API calls, while the page fixture drives the browser. It's a clean, unified approach that lets you build true end-to-end scenarios reflecting how your users actually interact with your app.
Key Takeaway: Combining API and UI tests in one project isn't just a neat trick; it's a best practice. It lets you create incredibly realistic and robust tests, like seeding data via an API and then immediately validating it in the UI, all within a single, atomic test.
How Do I Handle Different Test Environments Like Staging and Production?
The best way to manage this is with environment variables, all wired up through your playwright.config.ts file. I highly recommend using a library like dotenv. It lets you create a simple .env file to store environment-specific details like the BASE_URL or various API keys. Your config file can then read these variables and dynamically set the baseURL depending on which environment you're targeting.
When it comes to your CI/CD pipeline, you’ll want to set these as secrets directly in your provider’s dashboard (like GitHub Actions secrets or GitLab CI/CD variables). This is critical. It keeps sensitive info like production API keys out of your Git repository, making your test suite both secure and portable.
What Is the Best Way to Validate Complex JSON Responses?
Playwright’s built-in expect assertions get you pretty far, but when you're dealing with gnarly, nested JSON payloads, you need something more robust. This is where schema validation comes in.
By pulling in a library like Zod or AJV, you can define the exact structure, data types, and even constraints you expect from your API's response. In your test, you just grab the response and pass the JSON body to your validator. This makes your tests way more resilient. They’ll fail if the API contract changes in any way—a field gets renamed, a number becomes a string—not just if a specific value is off.
For simpler checks, a quick expect(response.json()).resolves.toMatchObject({ key: 'value' }); is often all you need.
Ready to stop wrestling with your CI pipeline and start shipping faster? Mergify provides automated merge queues and CI optimization tools that save developers time and reduce build costs. See how Mergify can streamline your workflow.