How to Merge Branches to Main in Git

Merging is at the core of the version control system Git's feature set. Git is a powerhouse for pushing code improvements and modifications from a local work environment to a remote production server or public repository. However, completing a seemingly simple merge can quickly become a chore if issues arise. At the very least, improper merging techniques can create headaches for fellow coders later on, confusing the history of your codebase and defeating the general purpose of using Git in the first place.
Linus Torvalds, the man responsible for creating Git, has even complained about badly constructed merges, such as those GitHub often generates and the trouble they cause for active development. A slew of poorly executed merges can make changes to your codebase difficult to understand and identify, slowing down production as they pile up. Read on to learn how best to manage your own merges.
What exactly is Git branch merging?
When you merge with Git, your code's history is consolidated into a single, sequential timeline ending in its latest version. A series of commands are used to select the appropriate branch to merge code changes into, identify the right branch to pull these changes from and delete the branch that’s no longer required for testing, and develop the newly incorporated changes.
Once you have completed a merge operation, your codebase will reflect whatever changes you’ve pulled into it, allowing others to use them or otherwise take them into account for additional development or deployment processes. This translates to Git intuitively selecting an appropriate merging algorithm and the common ancestor between the two branches you intend to combine, then creating a single commit that joins them both together, incorporating new code in the process.
How to merge a branch?
Merging a branch can be as easy as running the git merge command, but you'll need to know a bit more about the branch you want changes to be added to and the branch you're looking to pull data from before doing so.
Making changes to a branch
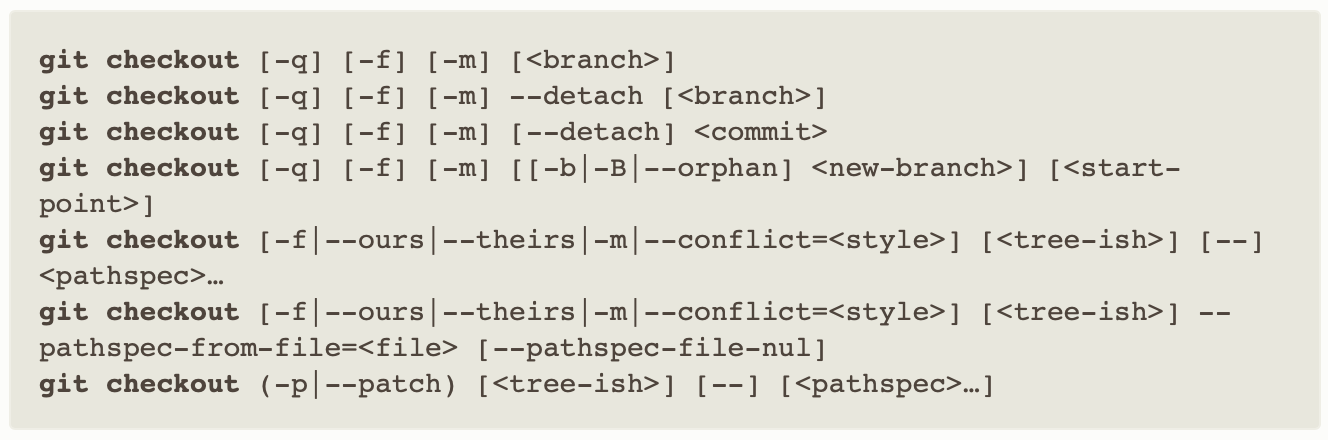
If you’ve already completed changes on a feature branch in your codebase, then you likely know how to handle the checkout command. For those who are unfamiliar with this step, the git checkout command is used to move from one branch to another. If the branch you are looking to switch over to already exists, then you can use the checkout command followed by its name to get there. However, it is also possible to create a new branch and switch over to it automatically. Running git checkout -b newbranchname should do the trick in this case.
There are quite a few additional things you can do with the checkout command, but the above should be enough for making most of your merges work. When you check out a branch, your working directory changes to reflect that branch's state. As you make changes to your code, you'll need to commit them before you proceed with a merge or check out another branch. Once your changes have been committed, you can move on to the actual merge you had in mind.
Merging a branch in Git
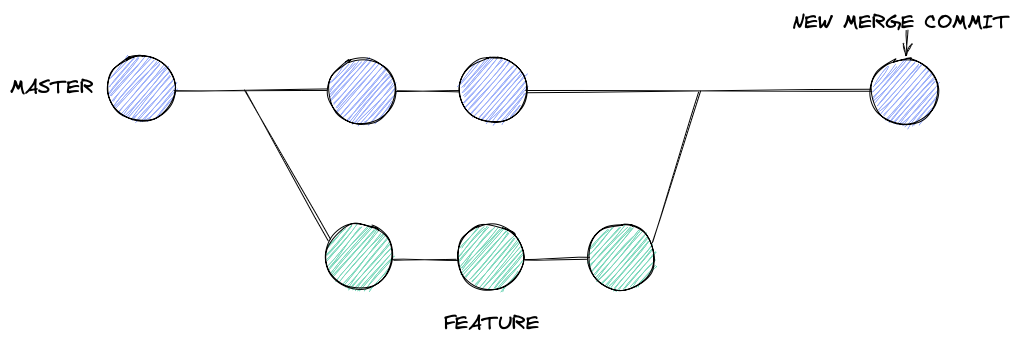
Merging a branch back into your main branch is simple enough, but you should jump back onto your main branch before executing the command. This can be accomplished with the git checkout command mentioned above. Once this has been done, you can use git merge featurebranchname to incorporate the changes you've introduced on your feature branch into your main branch.
David Mahler's video.
At this stage, Git will automatically choose an appropriate algorithm based on whether any additional changes have been merged since you first made your feature branch (or since you last updated it). If all goes well, then Git will either choose to fast-forward (where the main pointer for your main commit history is moved up to your update linearly) or perform a recursive function to find a common ancestor between your commit and whatever commit the main branch is currently on. These more complex merge scenarios can sometimes result in complications you'll have to resolve before continuing.
Merge branches with Mergify 🚀
Although branch merging can be simple, it can also quickly become quite complicated when working with a distributed team. As multiple contributors push their changes to the main branch, conflicts can emerge, slowing down development. Mergify can make things much easier with powerful automation functionality designed to complement dev teams' workflows while mitigating the more tedious issues that crop up as codebases evolve.
Mergify can make your life easier with automated merge queues that guarantee merges are processed one after another instead of all at once. Plus, with automatic merging, reviewer assigning, commenting, and more, your team's time can finally be freed back up for serious coding. Learn more about how Mergify can make merging super easy for your team and save you tons of time in the process today.