How to Apply a Patch File: Easy Step-by-Step Guide
When you boil it down, applying a patch file is all about using a simple text file to update your code. The go-to method for this is the git apply command, which you run in your terminal. It just reads the patch and makes the described changes to your local project files.
Why Patch Files Are Still Essential for Developers

Before we jump into the commands, it’s worth taking a moment to appreciate why this old-school technique is still so relevant. While modern tools like Git have completely changed how we collaborate, the humble patch file solves some unique and important problems that a pull request doesn't always handle gracefully.
A patch is really just a text file that lists the differences between two versions of a codebase. Think of it as a clean, portable set of instructions for turning one version of your project into another.
Practical Scenarios for Patching
Learning how to apply a patch isn't just an academic exercise; it's a practical skill that comes in handy more often than you'd think. Here are a few real-world situations where patches are indispensable:
- Applying Urgent Security Fixes: Imagine a critical vulnerability is found in a library your project uses. The vendor might push out a patch file immediately, long before a full, versioned release is ready.
- Integrating External Contributions: You might get a code contribution from someone who doesn't have—or need—commit access to your repository. They can just email you a patch, and you can apply it on their behalf while still giving them credit.
- Local Testing and Prototyping: A colleague has some experimental changes they want you to try out, but it's not ready for a formal pull request. They can quickly generate a patch from their work-in-progress for you to apply and test locally.
The real power of a patch is its simplicity and independence. It’s a self-contained chunk of change you can share, review, and apply without the formal overhead of a shared repository, offering a kind of flexibility modern workflows sometimes miss.
This skill has only become more vital as software ecosystems have grown more complex. The global patch management market was valued at around USD 589 million back in 2019 and is projected to hit USD 979 million by 2024. This jump highlights the ever-increasing need to manage vulnerabilities across a sea of applications.
If you want to see the full picture, you can explore the data behind patch management market growth. For any developer, mastering this process is a key part of keeping a codebase secure and stable.
Getting Your Workspace Ready for a Flawless Patch
Before you even touch that patch file, your first move should always be to get your workspace in order. I've seen it happen too many times: trying to patch a messy or outdated local repository is just asking for a world of frustrating merge conflicts and cryptic errors.
First things first, make sure your local environment is perfectly in sync with the remote source. This means pulling down all the latest changes from the server so your main branch is completely up-to-date. A quick git fetch origin followed by git pull origin main (or whatever your default branch is named) gets the job done. This simple step saves you from patching against obsolete code.
Next up, take a look at your working directory for any uncommitted changes. Your best friend here is the git status command. It’ll give you the full picture, letting you know if you have modified or untracked files lying around. A clean working tree is absolutely essential for a smooth patch application.
Isolate Your Changes
What if git status shows local modifications you want to hang on to? Don't just throw them away. Instead, use the git stash command to temporarily shelve your work. This tucks your changes away safely, giving you that clean working directory you need. Once the patch is successfully in place, you can bring your work right back with a simple git stash pop.
But the most crucial step of all? Create a new branch specifically for the patch. This is your safety net. Running a command like git checkout -b feature/apply-security-patch isolates the entire operation from your main codebase.Working on a dedicated branch is a game-changer. If the patch goes sideways or introduces unexpected issues, you can just delete the branch and hop back over to your main branch. No harm, no foul. Your primary development line remains completely untouched and stable.
This simple habit is what separates a controlled, professional workflow from a risky, chaotic one. By taking a few moments to prep your workspace, you set the stage for a successful and conflict-free update.
Applying Patches with Core Git Commands
Now that your workspace is prepped, it's time to get hands-on. The main tool you’ll be reaching for is git apply, a versatile command designed specifically to take a .patch or .diff file and apply its changes to your working directory.
What I love about this command is that it doesn't automatically create a commit. It just modifies the files, giving you a chance to breathe and review everything with git diff before you decide to stage and commit them yourself. It’s a much safer, more deliberate way to integrate code from an outside source.
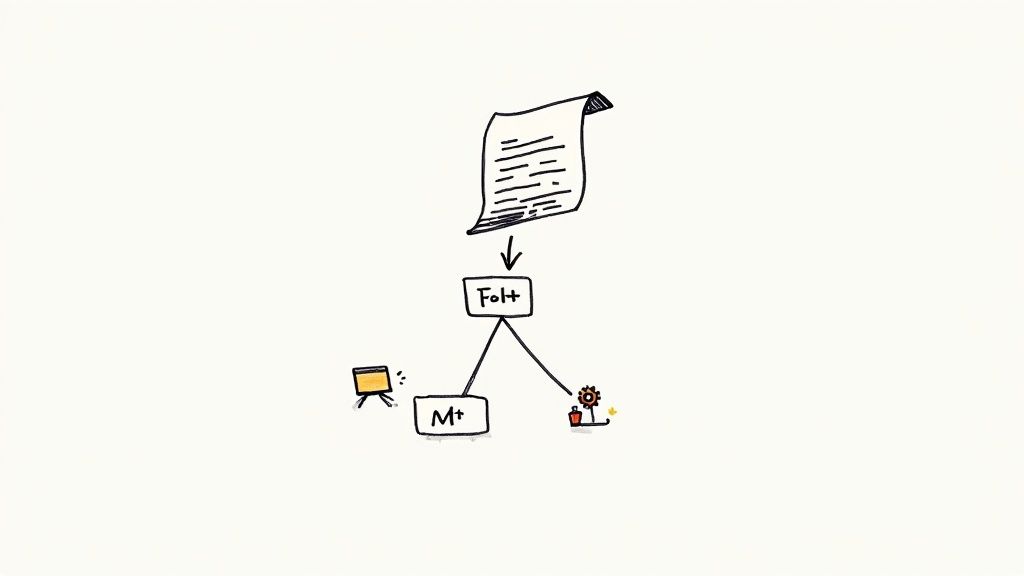
This diagram gives a simplified look at the command-line process for applying a patch.
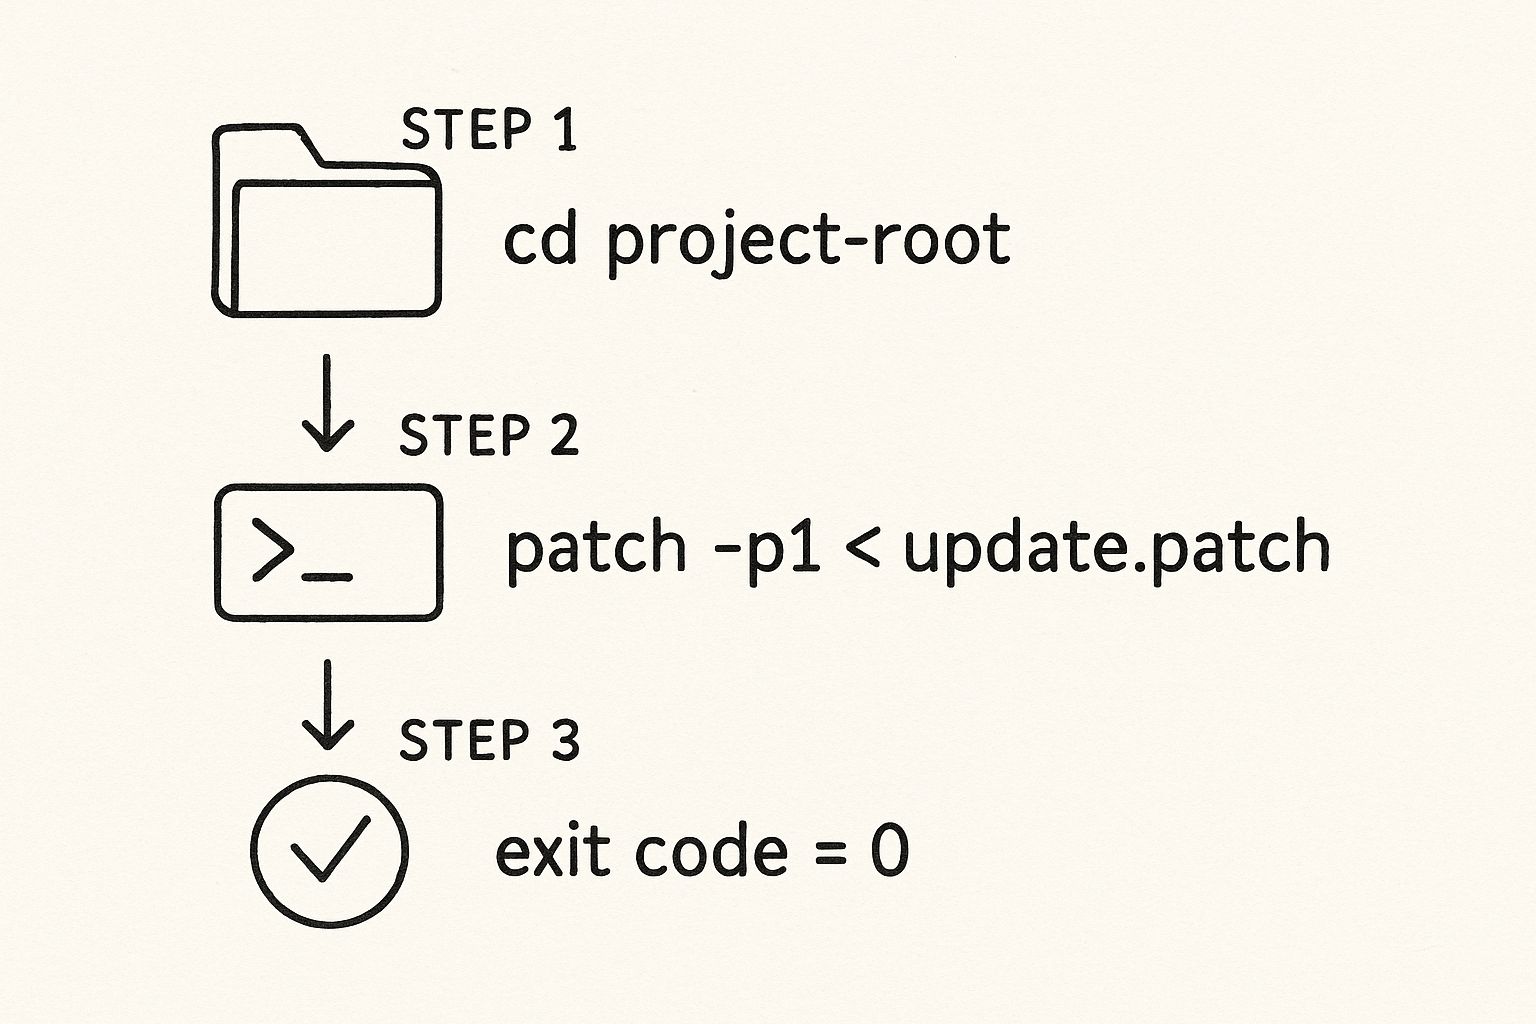
The flow is simple: move into the right directory, run the command, and if you get a zero exit code, you know it worked.
Performing a Dry Run with --check
Before you make any permanent changes, it's always a good idea to do a 'dry run.' Think of it as a simulation that checks if the patch can be applied cleanly without actually touching any of your files. It's an invaluable safety net.
You can do this using the --check flag:
git apply --check path/to/your/patch-file.patch
If the command runs silently and returns no output, you're golden. That means the patch will apply without any conflicts. If there are problems, Git will tell you exactly which lines are causing the issue.
The Actual Application Process
Once your check comes back clean, you're ready to apply the patch for real. The command is just as straightforward—simply remove the --check flag:
git apply path/to/your/patch-file.patch
Again, silence is a good thing. If the command finishes without any output, it was a success. From there, you can run git status and git diff to see the changes applied to your files, ready for you to stage and commit. This is way simpler than trying to merge branches with extensive histories, a process that can easily pull in unrelated changes.
While the commands look easy, the real-world challenges are anything but. In fact, a recent survey found that 71% of IT professionals see their patching process as overly complex. It takes an alarming average of 102 days to apply a critical patch globally.
Handling Email-Formatted Patches with git am
Sometimes, patches are distributed through email, especially in long-standing open-source projects like the Linux kernel. These aren't just raw diffs; they contain crucial commit metadata like the author, date, and commit message.
For these situations, git am (which stands for "apply from mailbox") is the tool for the job. Instead of just modifying files, git am reads the email-formatted patch (often an .mbox file) and creates a brand-new commit in your repository, preserving all the original author's information. This is critical for maintaining an accurate and clean project history.
Using it is simple:
git am < path/to/email-patch.mbox
This one command automates the entire process, turning an email into a proper Git commit on your current branch.
Comparing Git Patch Commands
To help you decide which command to use and when, here’s a quick-reference table breaking down the key differences between git apply and git am.
| Command | Primary Use Case | Key Feature | Commit Information |
|---|---|---|---|
git apply |
Applying simple diff or patch files to the working directory. | Modifies files but does not create a commit. | Ignores all commit metadata (author, message, etc.). |
git am |
Applying email-formatted patches (e.g., from a mailing list). | Reads the patch and creates a new commit automatically. | Preserves the original commit author, date, and message. |
Choosing the right command comes down to the format of your patch file and whether you need to preserve the original commit history. For quick changes, git apply is perfect. For patches from established workflows like kernel development, git am is essential.
How to Resolve Common Patching Conflicts
Even with the best preparation, a patch application can fail. When it happens, don't panic. It’s not a dead end—it's just a puzzle waiting for you to solve. Understanding why a patch fails is the first step toward fixing it, and it’s what separates someone who just runs commands from a developer who can really troubleshoot.
The most common culprit is a version mismatch. If the patch was created from a version of the code that's different from what you have locally, the line numbers and context won't line up, and Git will simply refuse to apply the changes.
Diagnosing the Failure
Another sneaky issue is line-ending discrepancies. A patch created on a Windows machine (using CRLF endings) might completely fail when you try to apply it on a Linux or macOS system (which uses LF). These invisible characters can stop the whole operation cold, leaving you scratching your head.
Luckily, Git gives you the tools to figure out exactly what’s going on. Your best friend here is the --reject flag.
git apply --reject path/to/your/patch-file.patch
This command is a lifesaver. It tells Git to apply all the "clean" parts of the patch—the chunks it understands—and then dumps the problematic sections into separate .rej (reject) files.
Instead of a complete failure, you get a partial success and a clear roadmap for what needs your attention. This turns a frustrating roadblock into a series of smaller, manageable tasks, which is a far less daunting prospect.
Manually Resolving Conflicts
Once you have a .rej file, open it up in your code editor. It will show you the exact lines that failed to apply, often with + and - symbols to indicate the intended additions and removals. Your job is to manually edit the target source file to reflect those changes.
This process is a lot like fixing a standard Git merge conflict. If you're new to this, it's an incredibly valuable skill to learn. You can get a much deeper understanding of how to resolve Git merge conflicts in our detailed guide.
After you've manually applied the changes and deleted the .rej file, you can go ahead and stage and commit your work. You're all set.
Bringing Patches into Your Automated Workflow
Applying patches from the command line is a solid, fundamental skill, no doubt. But in modern software development, it’s all about working smarter, not harder. Once your team starts juggling dozens of repos or fielding contributions from the community, manual patching turns into a serious bottleneck. At that point, automation isn't just a luxury—it's a necessity for keeping up your momentum and security posture.
This is exactly where workflow automation tools like Mergify come into the picture. Instead of a developer having to stop what they're doing to download, check, and apply a patch, you can set up a system to handle it all automatically. The trigger? A simple action inside a pull request. This weaves patch management directly into the development lifecycle you already have.
The best part is that it’s surprisingly straightforward to set up. Everything is managed through a simple YAML configuration file right in your repository. You can create rules that watch for specific triggers, like a patch file being mentioned or attached in a pull request's description.
Setting Up Mergify for Automatic Patching
Let's walk through a real-world scenario. Imagine a critical security fix lands in a pull request, but it's formatted as a .diff file in the PR body. With a simple rule in your Mergify.yml file, Mergify can spot it, grab the patch, and apply it directly to the pull request's branch.
Here's what a practical Mergify rule for this looks like:
pull_request_rules:
- name: Apply patch from PR body to the pull request
conditions:- body~=^diff
actions:
queue:
name: default
update:
patch: body
This tiny block of code tells Mergify to look for any pull request that contains a diff block. As soon as it finds one, it automatically applies the patch. This updates the branch, which then kicks off your continuous integration pipeline to run its checks. This powerful little trick helps streamline your entire CI process, making sure fixes get tested and merged way faster. The global market for patch management is growing for a reason, as highlighted in this market analysis by Fortune Business Insights.
- body~=^diff
By automating how you apply a patch file, you transform a manual, error-prone task into a reliable, hands-off part of your CI/CD pipeline. This shift frees up developers to focus on building features, not babysitting fixes.
This level of automation gives you consistency and speed, which is a massive win for teams needing to deploy updates quickly and without drama. To see how this fits into a bigger strategy, check out our guide on how continuous integration works.
Digging into Patch File FAQs
Working with patches can feel a bit arcane, even for developers who've been around the block. You're not alone if you've got questions about the best way to handle certain scenarios. Let's clear up a few common points of confusion.
What’s the Real Difference Between a Patch and a Diff?
You'll often hear people use "patch" and "diff" interchangeably, and most of the time, that's fine. But there is a subtle distinction. A patch is specifically created with the intent to be applied programmatically, while a diff is a more general term for any file that just shows the differences between two sources, often for a code review.
In the real world, though, modern tools are smart. A command like git apply will happily consume both .patch and .diff files without a fuss, so you don't need to sweat the terminology.
Can I Make a Patch from My Uncommitted Changes?
Absolutely. This is actually a fantastic way to share work-in-progress without having to create a messy commit history. Just run git diff > my-changes.patch to capture any unstaged changes in your working directory.
Already staged your changes for a commit? No problem. Use git diff --staged > my-staged.patch instead. This is great for creating a clean patch that only includes the work you've already prepared for the next commit.
What If a Patch Applies but Wrecks the Code?
It happens. The patch goes on smoothly, but suddenly your tests are failing or the app is crashing. Your next move depends on whether you've committed the changes yet.
If you haven't committed anything, the fix is easy: git reset --hard will instantly wipe the changes from your working directory, taking you right back to your last clean commit.
But if you've already committed the patched code, the safest way out is git revert <commit-hash>. This creates a brand new commit that cleanly undoes the changes from the problematic patch, all while keeping your project's history intact.Tired of manually juggling patches and worrying about broken builds? Mergify automates your merge queue and CI workflows so your team can move fast without breaking things. See what Mergify can do for you.


