How Mergify Can Help With GitHub Pull Request Automation

A pull request allows a contributor to a project to experiment with new code changes without affecting the main project, then submit those changes for review.
Managing pull requests can be time-consuming. You have to assign people to review code (or do it yourself), rebase your branches, and so on. If only it were possible to automate some of this stuff…
Well, it is possible — with Mergify.
Below, we’ll show you how Mergify can help you deal with all your pull requests, and we’ll explain the many benefits of using Mergify. But first, let’s review how to create a pull request in GitHub.
Creating a pull request
As long as you have read permissions for a repository, you can submit pull requests for it. That said, you can’t create a new branch without write permissions.
- Open GitHub and navigate to the main page of the repository for which you’d like to create a pull request.
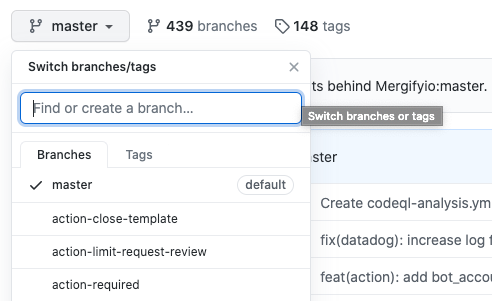
- Head to the Branch menu and select the branch with your commits.

- Click Pull request (above the list of files).

- Click on the Base dropdown menu to select the branch you want to merge your changes into.

- Click the Compare dropdown menu to choose the branch that contains your changes.
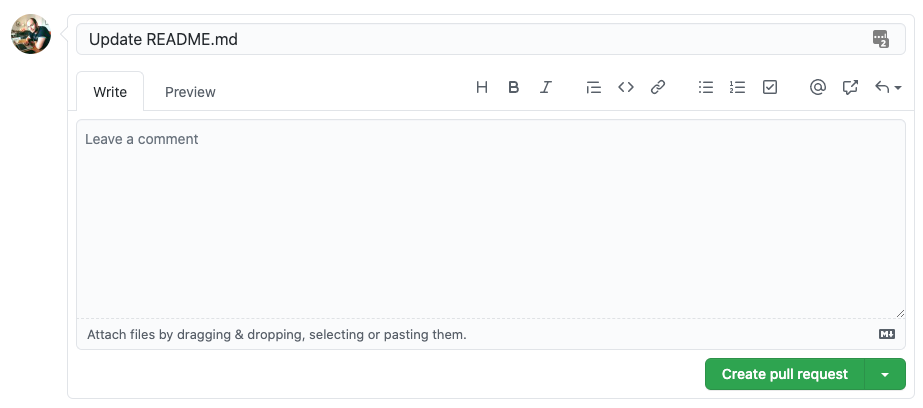
- Write your pull request’s title and description.

- Click Create Pull Request. You can also save a pull request as a draft by selecting Create Draft Pull Request, then clicking Draft Pull Request.
GitHub pull request automation with Mergify
Mergify enables GitHub pull request automation so you can focus your time and effort on more important things.
Step 1: Define your rules
First of all, you get to define the rules used to merge pull requests. There are several rule settings to choose from, such as requiring pull request reviews before merging.
Thanks to Mergify’s merge queue, you can automatically prioritize the most urgent pull requests first.
You can then write your pull request rules and conditions in YAML. You can match a pull request based on any criteria, such as author, branch, label, and more.
pull_request_rules:
  - name: automatic merge with one approval and CI passing
    conditions:
      - check-success=test
      - "#approved-reviews-by>=1"
    actions:
      merge:
        method: squash
Step 2: Enable Mergify
Enabling Mergify on your repository is as easy as a few clicks. Just log into your Mergify dashboard, click Enable Mergify on a new account, and select the repositories you want to give Mergify access to.
You can choose individual repositories, or opt for all current and future repositories with a button click.
Step 3: Sit back, relax, and merge
Now, you can simply sit back and watch Mergify’s bot do the work of merging pull requests. It’ll update pull request statuses and notify you of its progress in real time, and let you know which pull request criteria match.
Other ways Mergify helps out
Mergify can help your projects in other ways, too.
Onboarding
Mergify helps you welcome new contributors and onboard them fast in several ways.
For one, you can add personalized comments to their pull requests so they feel welcome and don’t get lost. Plus, you can guide them through how to fix a pull request or point them in the right direction for more help if a CI is failing.
This is exactly what AWS does in their open-source project AWS Cloud Development Kit.

Assigning reviewers
With Mergify, you no longer have to open each pull request yourself to see what has changed. Instead, you can write rules that assign pull requests to certain reviewers automatically based on defined conditions. You can even use random assignments.
Once your rules match the pull request, Mergify will automatically assign the pull request to the right reviewer. No manual work necessary.
Make your open-source projects easier
There you have it: a simple, step-by-step look at how Mergify simplifies your life when it comes to open-source projects.
The best part: Mergify is completely free to use on open-source projects. You really have nothing to lose and everything to gain here.
So sign up for Mergify today—if you use GitHub, it’s as easy as one click.


