How to Create Branch from Commit in Git: Expert Guide for Developers
Master the art of creating branches from any Git commit with proven strategies that work. Learn from experienced developers and discover practical approaches to effective version control management.
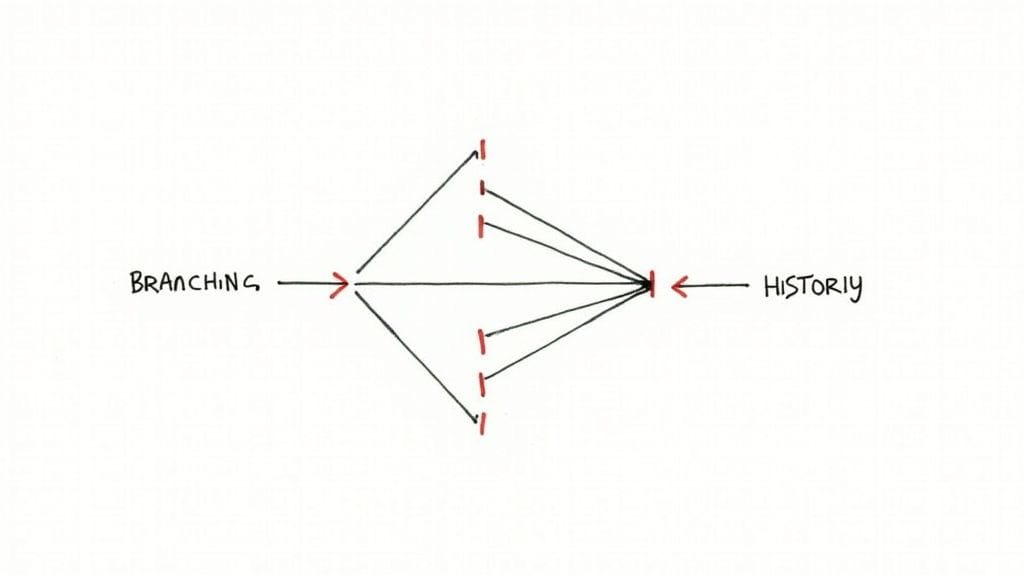
Creating branches from specific commits in Git is a key skill that opens up powerful workflow possibilities. When you need to start fresh from any point in your project's history, not just the latest version, branching from a commit gives you that flexibility. This core Git feature helps teams work efficiently on different aspects of their codebase.
Why Create a Branch From a Specific Commit?
There are several practical reasons to create branches from past commits. For instance, when you find a bug that was introduced several versions ago, you can create a branch right from the commit where things went wrong. This gives you a clean workspace to fix the issue without disrupting ongoing development. Similarly, if you want to try out new ideas based on an older, stable version of your code, branching from that commit provides an ideal starting point.
How to Git Create Branch From Commit: A Practical Guide
To create a branch from a specific commit, you'll need that commit's unique identifier, known as the commit hash. Start by finding the right commit using git log --oneline. This command shows a simple list of commits with their shortened hashes and messages. Once you spot the commit you want, use this command:
git branch <new-branch-name> <commit-hash>
For example, to make a branch called "bugfix-123" from commit a1b2c3d4:
git branch bugfix-123 a1b2c3d4
After creating the branch, you'll need to switch to it with git checkout <new-branch-name>.
Common Misconceptions About Branching From Commits
Many developers think that making a branch copies all the project files, but that's not how Git works. Instead, Git uses a smart system of pointers - your new branch simply points to the commit you chose. Any changes you make on this branch stay separate from other branches until you decide to merge them. This efficient approach is one reason Git has become the go-to choice for version control.
Branching Strategies for Effective Workflow
Smart branching from commits helps teams work better together. For example, while one group builds new features from a recent commit, another team can fix bugs by branching from an earlier stable version. This way, multiple development efforts can happen at once without stepping on each other's toes. By mastering when and how to create branches from specific commits, you'll be better equipped to handle complex projects and work smoothly with your team. This skill forms the foundation of good Git practices and helps keep your codebase organized and manageable.
Mastering Command Line Operations

Let's dive into practical command-line techniques that will help you work more effectively with Git branches and commits. Understanding these operations will give you greater control and precision in your daily Git workflow.
Locating the Right Commit
Finding the exact commit you need is the first step before creating a branch. While git log shows the full commit history, it can be overwhelming to parse. Try git log --oneline instead - it displays a clean list with shortened commit hashes and messages on single lines. For an even clearer view of your project's history, use git log --graph --decorate --oneline --all. This command creates a visual tree showing how branches relate to each other, making it easier to pick the right starting point for your new branch.
Creating the Branch
After you've found your target commit hash, creating the branch is simple. Use this basic format: git branch <new-branch-name> <commit-hash>. For example: git branch fix-login-issue a1b2c3d4 creates a branch called "fix-login-issue" starting at commit "a1b2c3d4". Remember that Git only creates a pointer to the commit rather than copying files, keeping operations quick and storage-efficient.
Checking Out the New Branch
To start working on your new branch, switch to it using git checkout <new-branch-name>. Following our example: git checkout fix-login-issue. This updates your working directory to match the code state at your chosen commit, letting you make changes isolated from other branches.
Handling Detached HEAD State
You might encounter a "detached HEAD" state when working directly with commits. This happens when Git's HEAD pointer references a specific commit instead of a branch. While this lets you examine old code versions easily, any new commits you make won't belong to any branch. Fix this by running git checkout -b <new-branch-name> to create and switch to a new branch, giving your work a proper home.
Streamlining with Aliases
Save time by setting up aliases for commands you use often. For instance, creating an alias git cobc = git checkout -b lets you create and switch to new branches more quickly. Small shortcuts like this add up to significant time savings, especially when you're creating multiple branches throughout the day.
Tracking Branch Creation
Good documentation helps teams work together smoothly. Use clear, descriptive branch names and detailed commit messages to explain why each branch exists and what changes it contains. This helps during code reviews and keeps your repository organized as it grows. For projects with many contributors, consider adding dates to branch names (like fix-login-issue-20241026) to help track when changes were started and sort branches by age.
Navigating Modern Git Interfaces
While the command line is essential for serious Git users, graphical interfaces give you powerful tools that make complex operations easier to understand and execute. These visual tools help you see your branches, commits, and repository structure clearly. Let's explore how teams successfully combine both GUI and command-line approaches.
Why Use a Git GUI?
Visual interfaces really shine when you're dealing with complex branch structures. Being able to see branch relationships makes it much easier to create new branches from specific commits, especially when working across many different branches. Think about trying to track down a bug through dozens of interconnected branches - a GUI can show you exactly how everything connects, making the process much simpler. GUIs also make common tasks like staging changes, fixing merge conflicts, and managing remote repositories more straightforward for developers at any skill level.
Popular Git GUI Clients
You have several excellent options when it comes to Git GUIs. SourceTree from Atlassian gives you a full set of features and clear visualizations - it works great whether you're just starting or have years of experience. GitHub Desktop connects smoothly with GitHub and makes tasks like pull requests and code reviews simple. GitKraken focuses on speed and visual appeal, with interactive graphs and drag-and-drop features that help you work faster.
Combining Command Line and GUI: A Balanced Approach
Most developers find they work best using both command-line and GUI tools together. You might use the command line for quick tasks like creating branches (git branch <new-branch-name> <commit-hash>) or making commits, while turning to a GUI to see branch history, resolve conflicts, or manage remote repositories. This approach takes advantage of what each tool does best - the command line gives you speed and precision, while GUIs provide clarity and ease of use for complex operations. This flexibility helps you adapt to different project needs and work the way that suits you best.
Platform-Specific Examples: GitLab's Web Interface
Web platforms like GitLab now include robust GUI features for branch and commit management. On GitLab, you can create branches directly from commits in your web browser, often eliminating the need for command-line work. GitHub and Bitbucket offer similar features, showing how important visual tools have become in modern Git workflows. Mergify, which helps automate pull requests and merges, makes development smoother by handling complex merging scenarios and maintaining code quality. This automation reduces manual work and errors, helping teams work more efficiently. More and more software teams are adopting these tools to make their Git workflows simpler and more reliable while connecting smoothly with their preferred platforms.
Managing Work in Progress Like a Pro
Developers frequently switch between branches when working on different features or fixing bugs. But what happens when you're in the middle of coding on one branch and need to create a new branch from a specific commit? This scenario creates a challenge - you can't just switch branches with uncommitted changes, as that would cause errors. Let's explore some practical ways to handle this common situation smoothly.
The Power of git stash
The git stash command offers an elegant solution for managing work in progress. Think of it as a safe drawer where you can temporarily store your code changes without committing them. When you need to switch to a new branch created from a specific commit, you can stash your current work, make the switch, and later retrieve your saved changes. This keeps your working directory clean and prevents conflicts during branch switching.
git stash push -u "my-wip-changes"
By adding a clear description to your stash, you can easily identify it later - especially helpful when you have multiple stashed changes. This allows you to create new branches from commits without worrying about losing your current work.
Leveraging Temporary Commits
For longer context switches, creating temporary commits can work better than stashing. While this approach is similar to stashing, it gives you a more permanent record of your changes. Just remember to clean up these temporary commits before merging your work into the main branch. This method works particularly well on team projects where you need to track individual contributions across different branches.
git commit -m "WIP: Temporary commit for feature X"
After making your temporary commit, you're free to create new branches from other commits. When you return to your feature branch, simply use git reset HEAD^ to remove the temporary commit while keeping your changes in the working directory.
Choosing the Right Approach: Stashing vs. Temporary Commits
Your choice between git stash and temporary commits should depend on your specific needs. Stashing works best for quick switches since it keeps your commit history clean. On the other hand, temporary commits make more sense when you need to preserve work for longer periods or want better organization. For example, if you frequently switch between branches from different commits, temporary commits can help you maintain better context than multiple stashes.
Handling Multiple Features and Urgent Interruptions
Working on multiple features requires a mix of these techniques. Picture this: you're developing two features, A and B, each on its own branch created from different commits. While coding feature A, an urgent bug report comes in. You can stash your feature A changes, create a new branch from the main branch commit to fix the bug, then return to feature A and continue where you left off. This approach helps you keep each task isolated and manage interruptions efficiently. It also makes code reviews easier since changes for each feature stay separate and organized.
Building Advanced Branching Workflows
Writing good code is only part of the challenge in software development. Managing how that code flows through your project requires thoughtful branching strategies. While creating a branch from a specific commit is a basic skill, knowing how to apply this technique effectively can transform how your team collaborates and delivers features.
Feature Branching and Isolation
The core of any good branching strategy starts with feature branches. When multiple developers need to work on different features simultaneously, keeping their work separate is critical. By creating a feature branch from a stable commit on the main branch, each developer gets their own sandbox to work in. They can make changes, run tests, and refine their code without worrying about conflicting with other developers' work. This separation keeps the development process smooth and reduces the headaches of merging code later.
Hotfix Branching for Urgent Fixes
Production bugs don't wait for convenient timing. When critical issues pop up, hotfix branches provide a focused way to address them. These branches start from the commit that matches the current production code, allowing developers to make targeted fixes without pulling in unfinished work. Once tested, the fix can be merged both to production and back into the main development branch. This approach lets teams respond quickly to issues while keeping the rest of their development work on track.
Experimental Branching and Innovation
Sometimes the best ideas come from trying something completely new. Experimental branches give developers the freedom to explore without fear of breaking anything important. Starting from a relevant commit, developers can test radical changes or prototype new features. If the experiment works out, great - merge it in. If not, no harm done. This creates room for creativity and innovation while keeping the main codebase stable and reliable.
Managing Long-Lived Branches and Release Cycles
Some branches need to stick around for the long haul. The develop branch collects completed features, while staging mirrors production for final testing. These branches require regular updates from specific commits to stay current. Tools like Mergify can help by automatically merging tested feature branches into develop branches. This structured approach means teams spend less time managing merges and more time writing code. Most importantly, it helps ensure that code flows smoothly from development to production.
By combining these branching patterns thoughtfully, teams can build workflows that make sense for their needs. Creating branches from specific commits becomes a key part of keeping development organized and productive, leading to better software delivered more reliably.
Real-World Implementation Strategies
Git branch creation is an essential technique that development teams use daily to manage their codebases efficiently. Let's explore common scenarios where strategic branch creation makes a significant difference - from bug fixes to feature development - and examine how teams effectively handle code reviews, conflicts, and long-running branches.
Recovering From Errors: A Branching Lifeline
When critical bugs appear in production code, teams need to act fast. By identifying the exact commit where the issue emerged and using git create branch from commit, developers can create a separate branch to investigate and fix the problem without affecting other ongoing work. For example, if a payment processing bug is discovered, the team can branch from the last known working commit, implement a fix in isolation, test it thoroughly, and merge it back to restore service. This targeted approach has proven essential for maintaining stable production systems.
Managing Features: Parallel Development Through Branching
Teams often need to work on multiple features simultaneously. Consider a scenario where one team needs to build a new dashboard while another updates the authentication system. Creating separate branches from specific commits allows both teams to work independently without stepping on each other's toes. Each feature can be developed and tested in isolation, then merged when ready. This prevents the complications that arise from mixing unrelated changes in a single branch.
Managing Long-Running Branches With Mergify
Development teams typically maintain several long-running branches like develop and release that need regular updates from the main branch. Mergify helps automate this process by handling the merging of changes from specific commits automatically. This keeps long-running branches current and prevents the buildup of complex merge conflicts. Teams can focus on writing code instead of managing branch synchronization manually.
Streamlining Code Reviews and Merge Conflicts
Creating branches from specific commits helps teams conduct more effective code reviews. When changes are isolated to a single feature or bug fix, reviewers can focus on relevant code changes without getting distracted by unrelated updates. If conflicts do occur, they stay contained within that branch rather than causing problems across the entire codebase. This focused approach leads to higher quality code and faster review cycles.
Practical Checklists for Branching Challenges
Here's a straightforward checklist to help manage branches effectively:
- Identify the Commit: Use
git log --onelineto find the precise commit hash. - Create the Branch: Employ
git branch <new-branch-name> <commit-hash>. - Checkout the Branch: Switch to your new branch with
git checkout <new-branch-name>. - Document the Purpose: Use descriptive branch names and clear commit messages.
- Consider Automation: Explore tools like Mergify to streamline complex workflows.
These strategies combined with tools like Mergify help teams work more efficiently together. Mergify provides merge automation features including merge queues and automatic updates that reduce manual work and help maintain a clean Git history.
Make your Git workflow more efficient and boost your team's output with Mergify. Explore Mergify's powerful features and start your free trial today!


